Saturday, 29 March 2014

1:300 BE2c — progress

The fuselage of my 1:300 scale BE2c is pretty much complete.

The majority of it is carved from a piece of clear 2mm acrylic, which is quite good for this sort of work because it's pretty hard, and takes good sharp facets. Softer materials are easier to work, but the down-side is that they're also easier to over-work inadvertently. It's easier to see what you're doing with opaque acrylic, but I don't have any to hand. Brass would be ideal, but again, I don't have any in the thickness I'd need.

The engine, crew and airscrew are made from stretched sprue, the cabane (?) behind the pilot is Green Stuff.

You find yourself in a tavern...

http://bejzar.deviantart.com/
I don't believe I've ever begun to run an adventure with those words, and as far as I can recall, I've never played in a game where the DM started us out in a tavern, being approached by a Mysterious Stranger. Even by 1981, which is when I first started playing roleplaying games, it was a cliché to be avoided. It's kind of a pity, because it's a starting point ideally suited to provide a whole lot of background colour for the party without a whole lot of effort on anybody's part.

Who hangs around in seedy, smoky taverns, picking up dodgy jobs from furtive, wary strangers? Not your bright shining heroes, that's for sure. And nobody who's already well off. Immediately, everyone sitting at the gaming table knows that they're not the sort of people who are going to be invited to a royal garden party any time soon, and they're probably not a group who has an easy, problem-free relationship with whatever law-enforcement authorities may exist.

If the tavern looks anything like the one in this picture, everyone can be pretty sure from the get-go that they're not too plump in the pocket. That's not a salubrious or respectable establishment, and that doesn't look like a good neighbourhood, so the work they're likely to pick up is pretty likely to be... questionable, at best. Obviously there are much better, more comfortable parts of the city to be — we can see them over there, in the background — but we're not there. We're on the outskirts, in this shit-hole, associating with the scum of the earth.

Just showing this picture and starting with "you find yourself in a tavern...", and you've immediately set the tone for the whole campaign.

There's a reason why clichés become clichés. They work.

Friday, 28 March 2014

Madness, sheer madness.

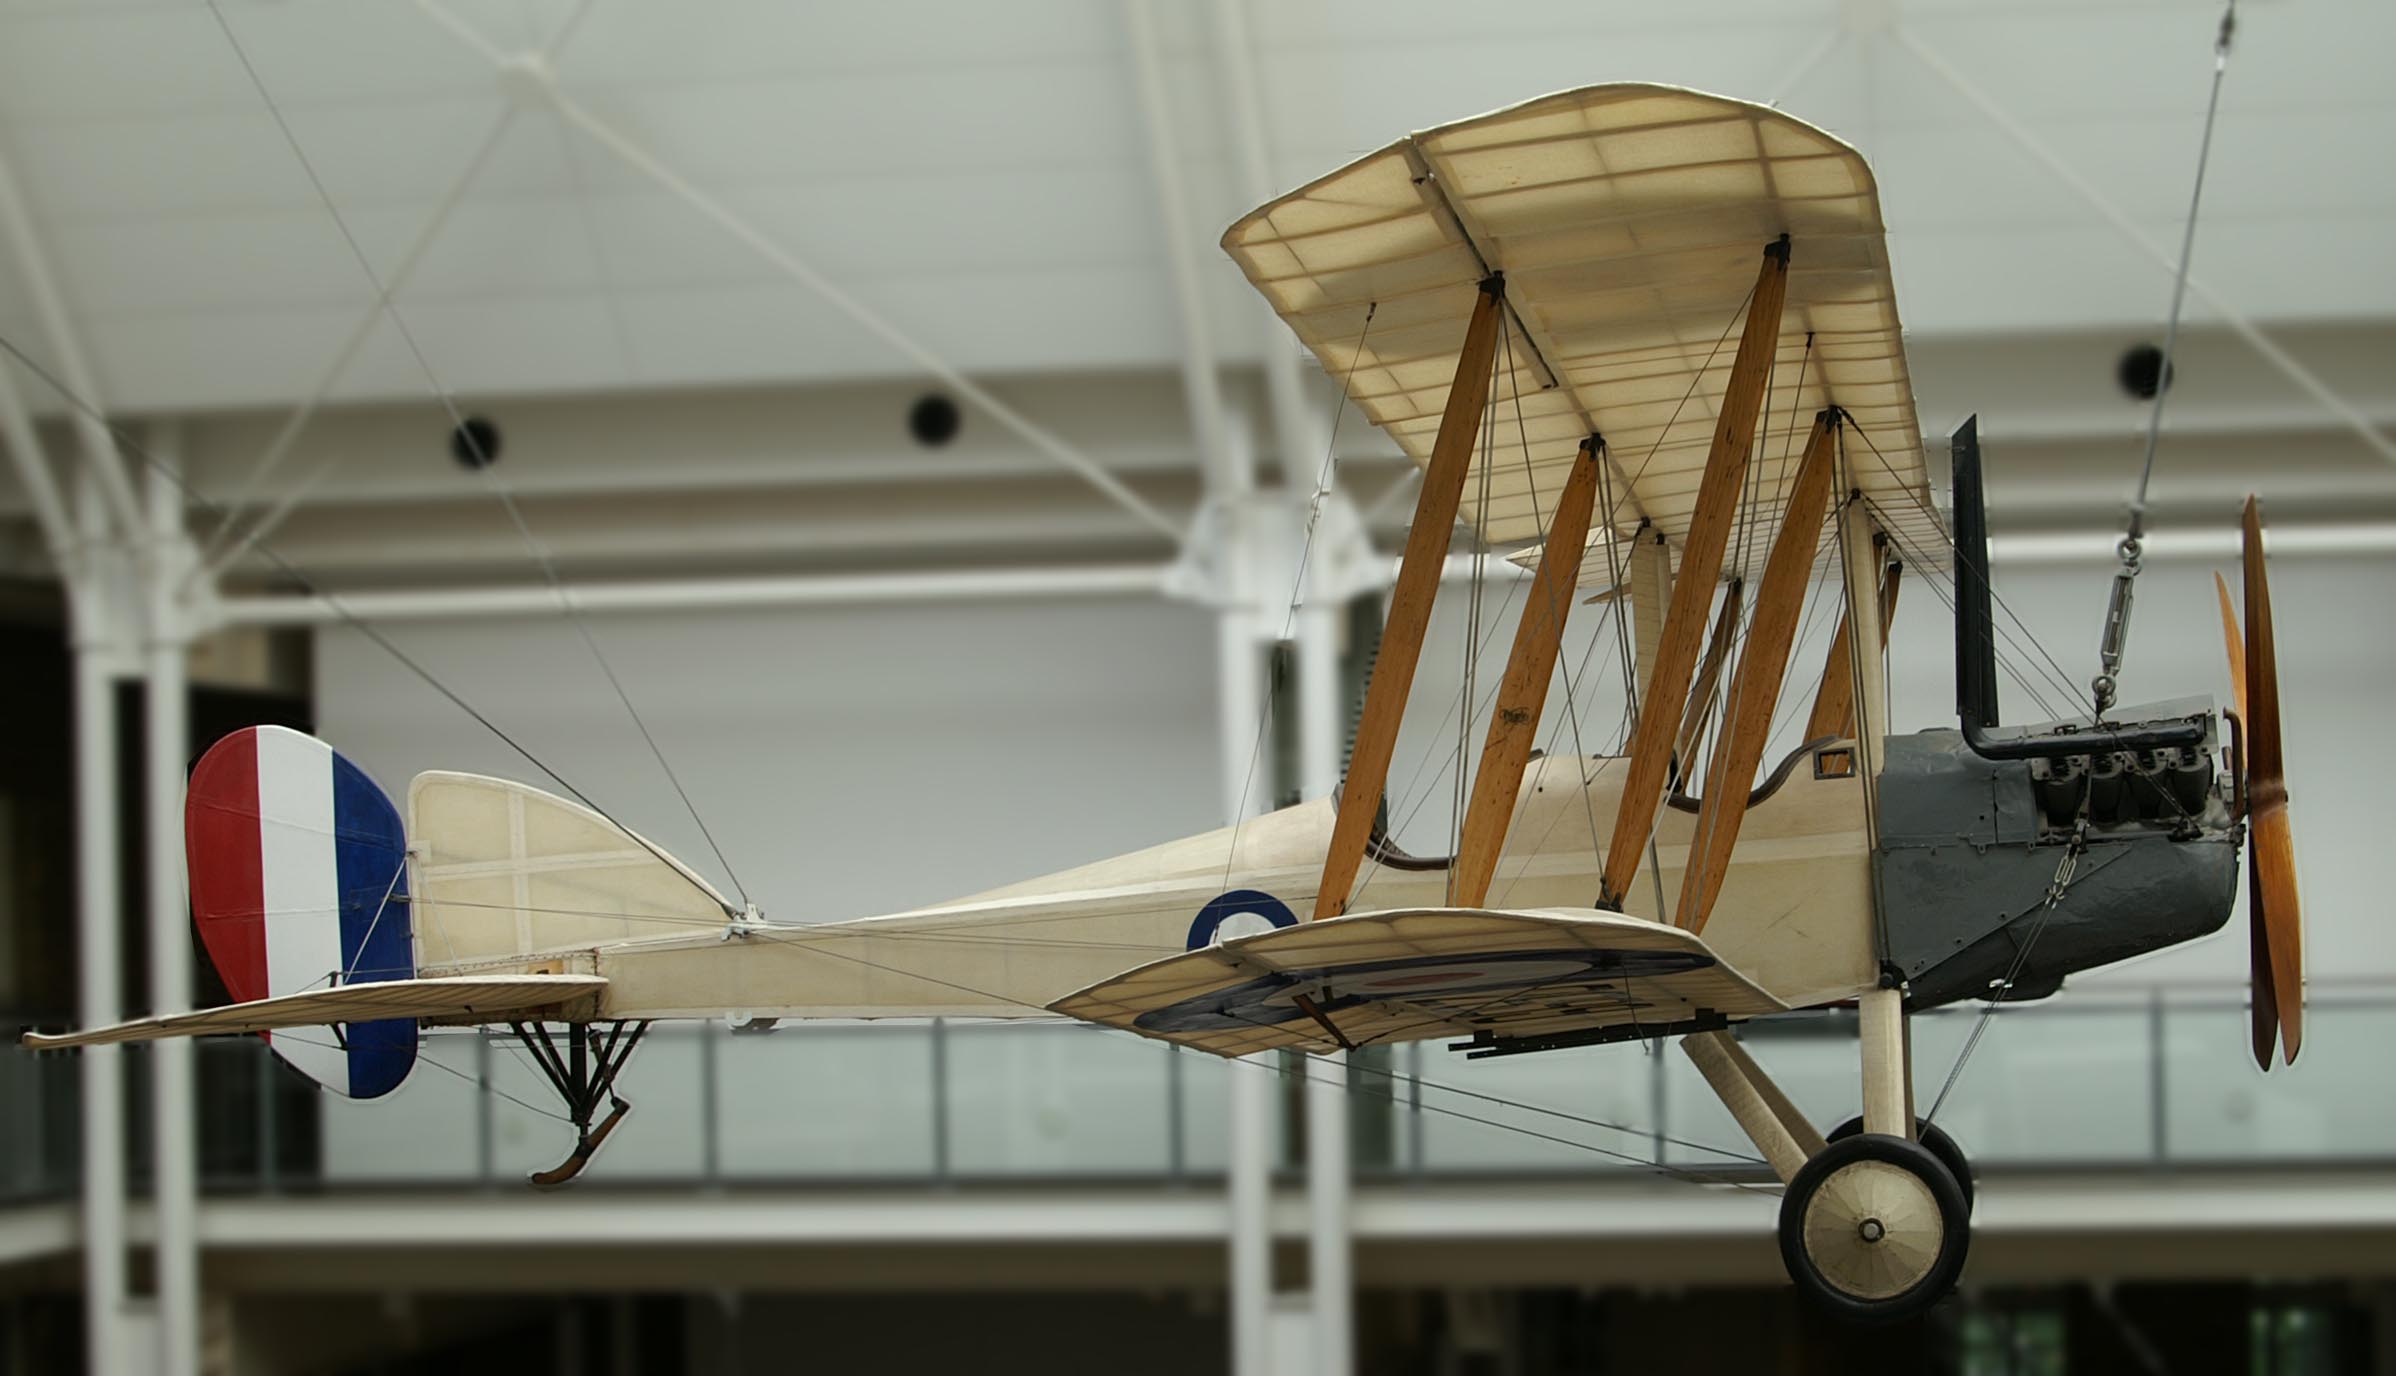
For some reason, I became overcome with an uncontrollable urge* to build a 1:300 scale model of a BE2c (that's a very slow, very stable British WW1 aeroplane, for those who don't know).

Just on the off-chance that somebody else might be suffering from similar insanity, here's a link to a PDF I made containing 1:72 3-view drawings of the BE2c-d and BE2e, plus sizing/cutting templates in 1:72, 1:144, 1:288 and 1:300 scales.

* I suspect orbital mind-control lasers at work again.


Later that day...

I've begun the new teensy-tiny aeroplane.

I printed out the 1:300 template on to light card, and cut out all the flat bits — I'll use the drawings of the fuselage and what-not to check my proportions against when I come to carve it out of whatever I can find to do the job (probably a bit of perspex).

The struts are just 24 gauge copper wire, bent around a former to get a consistent parallelogram. There are more precise ways of achieving this, but for gaming pieces I don't really see the benefit in going to that much extra bother.

Having a computer and printer makes this process a lot easier than the last time I made cardboard-and-wire-and-wood model aeroplanes; that was in the late '80s, and then I had to laboriously transfer the drawings by hand.

Monday, 24 March 2014

The War In The Air Proceeds Apace


Now that I have all the tiny aeroplanes I've built (so far) on little magnetic stalks, I can actually start playing with them. I haven't made any arrangements for representing different altitudes as yet, but that can come later — I've ordered some 3mm clear acrylic rod for the purpose.

The rules I'm trying to learn are Canvas Eagles, which have the significant benefit of being free.

I've created a game mat by the simple expedient of whipping one up in CorelDraw, pumping out a PDF, and getting it printed at A0 size at Warehouse Stationary for about $25. At the moment I'm using roughly 75mm hexes, which provides plenty of room for multiple aircraft in the same hex, but I suspect that 50mm would be big enough, and would provide a larger playing area within the same board size. I'll see if it's necessary; if so, it's quick and easy to get another hex-grid printed.

There's a DH2 and a Fokker E-III in amongst the melee shown above. They really don't stand much chance of survival; it's just not fair at all.

MicroAirWar... the Continuation

Next in the line of 1:300 scale WWI aeroplanes to take to the gaming board is this SE5a of 1917. The model is by Skytrex.

It's OK as a gaming piece, but those wings are very, very thick. And that's after quite a lot of filing. As usual, struts were added in wire.

Painting the RFC roundels by eye is a bit nerve-wracking; they never turn out precisely round. However, I think they look OK for gaming purposes.

This is how I make my magnetic flight stands.

I glued together a 90° MDF jig, to the bottom-plate of which I glued a steel strip for the neodymium magnets to stick to, and on the back-plate, a magnetic strip for the dressmaker's pins to stick to.

I used a set square to draw 90° lines on the magnetic strip to align the pins by, and at the same time, drew lines from the bottom of the square on the steel strip. This ensured that the pins and neodymium magnets were centred on each other.

In behind where the magnets go, I put a few layers of masking tape. This creates a stand-off for the magnets so that they're not inadvertently glued to the MDF back-plate, and also pushing them hard against it centres them on the pin shaft, so I don't have to do it by eye every time. I checked by eye with each layer to make sure I was getting the right thickness of tape; in this case, I needed three layers.

Then it's a simple matter of dipping the pin-head in super-strength 24-hour epoxy and aligning the shaft on the lines drawn on the magnetic strip.

One other thing: I draw on the end of the magnets with a Sharpie when they're still on their stack, before I place them. This ensures that I can keep all the magnets in the same polarity just by making sure that the coloured end is always up.

Friday, 21 March 2014

Tiny Halberstadt CL-II

Since I'm on a bit of a tiny-plane jag at the moment, I thought I'd put together and paint some that I've had sitting around for quite a few years.

This one is from Skytrex I believe (though to be frank it's been so long that I've forgotten exactly who the manufacturer was). It's 1:300 scale, with a wingspan of 34mm, and it's supposed to represent a Halberstadt CL-II, a German two-seater fast reconnaissance and ground-attack aeroplane which went into service in the latter half of 1917. The silhouette isn't absolutely perfect, but it's certainly good enough for gaming purposes.

Once assembled and painted, these Skytrex models don't look too bad. However, they do require quite a lot of attention to get to that point. I had to do quite a bit of filing to thin down the wings and tail, and I had to build the wing struts and landing-gear axle from wire.

The wing rib detail is incised into the surface, not raised, so I had to bring out the ribs with paint. That's OK; the scribed detail provides a pretty good guide for painting.

The post it's mounted on is a 1mm thick panel pin epoxied to a 3mm neodymium magnet. Eventually, when the 3mm clear acrylic rod I ordered arrives, I'll make a bunch of magnet-tipped flight stands and hopefully start using all these little planes to play some wargames with.

Wednesday, 19 March 2014

Sausage-fingers vs. Tiny Planes, part 2

Following on from my last post, I thought I'd give creating a photo-etching template a go. I've never done it before, but I think I know roughly what's required.

These are all the flat (or flattish) bits for building a 1:288 scale DH2. I haven't included any construction instructions, but if you know roughly what a DH2 is supposed to look like, I think it's all pretty simple.

I've assumed that it would be etched from 0.35mm shim; probably brass would be best. I don't know how one goes about allowing for partial etching, so I haven't included any fold lines or anything. Hopefully it will expose and etch well enough using something like Puretch, but having zero experience myself, it could all be a terrible disaster waiting to happen.

Here's a PDF of the template for high-resolution printing.

If anyone should decide to give it a go, I'd love to hear how it went. I'd love to try it myself, but I can't readily lay my hands on the photopolymer... maybe some day.


Tuesday, 18 March 2014

Sausage-fingers vs. Tiny Planes

A couple of months ago, a company (whose name now escapes me) had a half-price clearance sale of their Heroics & Ros 1:300 scale WW1 aircraft. Naturally, I couldn't resist bait like that, and I bought a whole bunch of them.

Among them is the DH2, a British pusher (i.e. with the propeller at the back) scout (i.e. single-seat fighter).

This thing is a double-buggering bastard of a model to assemble. I've scratch-built a micro-scale DH2 before, back in the Olden Days when I still had things like eyesight. It's the painted model in the left foreground of the photo. I made it out of wood, cardboard and wire, and I'm pretty sure it didn't take me as long to scratch-build that one as it's taking me to assemble this prefabricated model.

The problem with the H&R model is that almost every single piece is cast separately — every wing strut, each tail boom — and there is no easy way to keep everything straight and square while you're putting it together. The components aren't cast terribly precisely either, so the struts and booms are out of scale and everything has visible mould-lines where the moulds were slightly offset. I've replaced all the wing struts with wire, which still looks massively over-scale, but at least it's round and smooth.

This is a model that would be vastly improved by having most of the components made in photo-etched brass, with only the nacelle really needing to be cast. I'd make a template and do it myself, except that I don't have access to the means of exposing and etching the brass.

Monday, 10 March 2014

Dungeon Doors

I bought these resin pieces many years ago, in the late '80s, and I no longer remember who it was that manufactured them. They've been sitting waiting to be painted all that time, and now they are.

I probably should have photographed them with a figure for scale, but I didn't, so tough luck. They'll do fine for 28mm miniatures.

Thursday, 27 February 2014

Bonesium Orc

Reaper Bones 77056: Orc Sniper (Archer) by Tre Manor
This is the figure from my Sculpey-baking experiment, all painted up and ready to go. It's a speed-paint with a very limited palette, since he's just going to be one among many orc-mooks, but I find it kind of suits him.

Wednesday, 26 February 2014

Super Sculpey and Bonesium

I like to mount my figures on steel washers, as I've mentioned before. That often means I have to extend the figure's base so that it doesn't look like it's just been plonked down on the washer.

Normally I use Green Stuff, but that takes an age to cure, and I don't really have as much patience as I ought. So I've been looking around for something that I can model easily and that cures quickly. Super Sculpey seems to fit the bill nicely.

It doesn't cure without being exposed to heat (130°C, 15 minutes per 6mm thickness), so I can take my time with modelling, unlike with fast-cure epoxy putties. I was a bit unsure whether the heat would be too much for a plastic miniature, but it seems to be fine: the Bonesium does get soft and wobbly, but the low temperature required to cure the Sculpey doesn't come close to melting it.

The only issue I've found with using Sculpey, as opposed to Green Stuff, is that it doesn't stick to the plastic very well at all. That's not a huge problem though, and I can see times when it would be a positive advantage.

Tuesday, 25 February 2014

New Toys


Yippee! New toys from Reaper!

  • Back left: 77184 Spirit of the Forest (x 2) — ents. Or treants, if you don't want to anger the Tolkien machine.
  • Back centre: 77103 Nor'Ock, Ettin — two heads good!
  • Back right: 77183 Frost Worm — a remorrhaz, basically, except for licencing purposes.
  • Front: 77185 Large Earth Elemental (x 3) — Grrg-nak! Grrg-nak!
  • plus a sample bottle of paint of horrible hue.

These things are amazing hard to photograph due to being incredibly white and ever so slightly translucent; this photo required considerable post-processing to get any detail showing at all.

Once again, they've sent me a sample pot of their paint. It's a pretty lurid, horrible pink, and I don't know that I'll get a lot of use out of it. I will be interested to see if this bottle suffers from the same flow restriction as the first they sent me.

Monday, 24 February 2014

Terrible Sword Babe

I've had this figure sitting on my painting table for years. Many, many years, since the late '90s or thereabouts. I never got around to finishing it because frankly I think it's a pretty awful figure; today I painted it pretty much just to get it out of the way.

It's a Citadel figure, and far from one of their best. Her grip on her sword is weird — I wouldn't say impossible, but definitely improbable. The armour is mostly pointless. And she's wearing a fucking thong. Jesus.

Now that I look at the base, it looks to me like she's sliding around on Green Slime. That'll end well.

Sunday, 23 February 2014

Leftover Putty Monster — painted

Here's my Leftover Putty Monster, all painted up and ready to horrify a party of staunch, stolid adventurers with its incessant complaining, whining, and self-pity.

I'm kind of tempted to take a silicon rubber mould of the thing and pump out about a dozen, but we shall see. The mouth-cavities could prove to be problematic; I'd probably have to fill them a bit.

Friday, 21 February 2014

Leftover Putty Monster

I always mix too much putty. Always. Mostly I just toss the surplus, but from time to time I make it into something not too challenging. This is one of those times.

Because I've never got my act together to put together an armature, blobs of various sorts seem to be my go-to sculpting projects.

This little guy is all eyes and mouths. His skin is supposed to be coarsely textured, like an elephant's. He's about 20mm x 17mm x 10mm tall.

One of these days I'd like to get some very small ball-bearings or something, in various sizes, that I can use for eyeballs.

Monday, 17 February 2014

Figure Scale Comparison


Some guy on some forum was asking about the comparative sizes of figures in various scales, so I thought this might be a useful guide.

Sunday, 9 February 2014

Vibius

Here's another figure I painted for our current AD&D party. This one is Vibius, a Roman ex-soldier, the character of my friend Joff.

The figure is a late Republican Roman centurion, one of the plastic set from Warlord Games. They're excellent models, and extremely cheap too, compared with metal 28mm figures — these ones work out to about $1.33 each, which would actually make a whole 28mm wargames army feasible. They do a range of waterslide transfers for the shield designs too, which would make recreating them well much, much easier, though as of writing they're mostly out of stock.

My knowledge of Roman arms is fairly sketchy, so I don't know just how accurate this paint-job is. It will do for me though.

Friday, 7 February 2014

Catriona


This is another figure from my pile of swag from the Reaper Bones Kickstarter. Unfortunately I don't know what the model number is; I can't find it in Reaper's online catalogue, and I suspect it's one of the ones that has been withdrawn due to moulding issues. It has very poorly defined detail in the hands and face, both of which are moderately important areas when you're modelling the human form. I've done what I can with paint, and it looks OK as long as you're not looking at it from two inches away.

It's a figure destined to represent my friend Andrew's character, Catriona the druid. There's a remarkable paucity of druid-suitable figures available of either sex, and this is the closest we could come from amongst the figures I have.

Monday, 27 January 2014

Altar of Plastic Eeeeeevil

More of those Bones-painting shenanigans. This time it's number 77139: Altar of Evil by Bob Olley.

Again, it's a model that I've painted before, but differently.

The idea of painting flames in the arches came from somebody else; I saw it somewhere on the internet and I thought I'd give it a go, but alas, it looked a lot better inside my head than it does in real life. Hey-ho, could be worse I guess.

Tuesday, 21 January 2014

Plastic Sarcophagus

Reaper Bones 77137: Sarcophagus by Bob Ridolfi
 I've painted another of this model before.

That time I wanted a stone effect; this time I was going for antique bronze. That time I rendered the interior as carved from the stone of the casket; this time I wanted decayed fabric lining.

I really hope that Reaper start producing a lot more of their "dungeon dressing" miniatures in Bonesium. In metal, they're just far too expensive — similar models to this one are going for in excess of twenty bucks, which is way more than I'm happy to pay just to elevate my tabletop mapping above a box drawn on a bit of paper and marked "sarcophagus".

I keep my eye out for this sort of tabletop-terrain thing at cheap novelty shops and so forth, but they come up a lot less often than I'd like.


Monday, 13 January 2014

Reaper Stone Golem

Reaper 77171: Stone Golem by James Van Schaik
It's been a while since I did any painting of my vast pile of Reaper Bones plastic figures. This is one of them.


Friday, 3 January 2014

More adventures in laser-cutting

I designed, and had cut for me, this dice tower. It's cut from 2mm MDF, and it all slots together very straightforwardly, which is gratifying.

Those are 12mm six-siders in there, ten of them. The collection tray caters quite easily to ten or twelve dice at a time, but any more than sixteen and it gets seriously crowded. It would be easy enough to enlarge the tray, but I wanted to keep its footprint on the gaming table as small as possible.

The walls of the collection tray could probably be lower and still stop dice from cascading all over the table; I might experiment with taking them down to about 6mm high, which would make retrieving dice from the tray a bit simpler.

It's a bit noisy in use, but that could be easily ameliorated by gluing some felt or something to the inside surfaces*. It's probably not ever going to be a huge issue though.

Something this size would be easy to disguise as a piece of tabletop terrain — a pele tower, or grain elevator or something. I shall experiment and see what can be done.

Follow-up:

I did glue some felt to the baffles and to the floor of the collection tray, and it did cut down the noise, but it had the unexpected side-effect of bouncing the dice out into the tray much more vigorously than before, so they bounced over the walls quite frequently.

I could make the walls of the tray higher, but that would make retrieving the dice more troublesome.

Perhaps the felt isn't all that necessary anyway. After all, the noise isn't all that objectionable.

Sunday, 29 December 2013

Toy Soldiers (again)


This is another of the 54mm plastic toy soldiers I bought recently, this time painted all red and colourful and shiny, instead of khaki and drab and shiny.

The battle of Ginniss, in the Sudan (30th December 1885) was the last occasion on which the British army fought in red. At this battle, as well as a couple of others eg. Kirbekan, the troops were ordered to fight in their red parade uniforms ‘to look more formidable to the Dervishes’.

This chap isn't quite right for that period, because he should have a breech-loading Martini-Henry rifle; this figure appears to have a rough approximation of the bolt-action magazine-fed Lee-Metford or the like. However, he'll do perfectly well for my purposes.

Saturday, 28 December 2013

Toy Soldiers

I recently bought myself some 54mm plastic toys soldiers by Armies in Plastic via the Toy Soldier Company and Regal Toy Soldiers and I'm not quite sure how I'll go about painting them. The only firm decision I've made is that they'll be gloss varnished, because toy soldiers have to be all glossy. That's just a hard physical rule of the universe.

These ones are modelled on British infantry in Egypt and the Sudan in the 1880s.

Option one (the top photo) is the more toy-like method. I've done a bit of outlining, which goes against the Pure Toy Soldier aesthetic I suppose, but I felt it needed just a bit more definition than a simple flat paint job could provide.

Option two (the lower image) is in a more modern wargames tabletop-quality style, though simplified a bit. Three tones — shadow, mid-tone and highlight — to give the figure a bit more depth and modelling. It does look a bit less toy soldierish, and it also takes a bit more time than the simpler paint job, but I think I'll probably go that way.

The gloss varnish does tend to blow out the highlights in the photographs; I'm not quite sure how to remedy that. Hey-ho, on the scale of things that's a pretty small problem.

Thursday, 19 December 2013

I needed it, I tell you!

I believe I've revealed, from time to time, my love of Stupid Dice.

This d100 is not as stupid as some, but it's certainly reasonably stupid, and I am proud to own one at long last.

Somehow I doubt that it will see much use in the real world, but THAT'S NOT THE POINT.

Friday, 6 December 2013

Blood-blob par excellence

Observe, if you will, an example of the very apogee of the miniature sculptor's art.

Not the knight; he's all very well, but what I mean is the exquisitely rendered featureless red blob. Pretty neat, huh?

OK, so it's something any kindergarten kid could crank out between sessions of making plasticine penises. I had a bit of epoxy putty left over after another job, and I couldn't be bothered doing anything more creative with it. However, miscellaneous blobs, moulds and oozes always come in handy, and they're not the sort of miniatures anyone would ever really want to spend actual money on.

So, now I have a little blood-blob to terrorize hapless PCs with. Huzzah!

Litko Boom-Boom Burn-Burn Markers

This is what they look like with the light in front...

...and this is them with the light behind them.

The guys in that tank and that truck
could just be in a tiny spot of trouble.
Just arrived today, after a pointless diversion to the Netherlands (I suspect that USPS sent them off to old Zealand instead of New Zealand), are these laser-cut acrylic blast and burn markers from Litko.

I'd seen them in photographs on the Great and Glorious Internet (She At Whose Bountiful Teats We Daily Suckle) and I've wanted some for a while, but until recently I didn't actually know who made them. Now I do know, and now I have some of my own. There are four sets in total shown in these photos.

They come disassembled, and need to be glued together. Therein lies a trap for the unwary, for cyanoacrylate adhesives (superglue), the glue used almost universally by modellers these days, will fog acrylic sheet. Fortunately, I already knew this, having worked with acrylic sheet a lot when I was employed in the Display Department at Canterbury Museum, back in the '80s.

I whipped up some acrylic cement of my own by dissolving some acrylic fragments in acetone, making sure it stayed just liquid enough to run into the joints by capillary action, and cemented the little suckers together in a jiffy. You can use straight acetone, but by adding the dissolved acrylic it adds a degree of gap-filling capability, and more importantly, it slows the evaporation of the acetone, giving it more time to soften and cement the edges of the components, so you get a stronger weld.

They weren't especially cheap, but neither are they overly expensive, and I think they look pretty good on the table. They certainly look better than using a bunch of dice to indicate the extents of a barrage.

Thursday, 5 December 2013

Bearer No.2

77141: Townsfolk: Oswald the Overladen by Bobby Jackson
The Paintin' o' th' Bones continues, this time with a disgruntled and overladen hireling bearer.

I have another one of these guys which I will paint in a slightly different colour scheme, and with another forehead-number, just to differentiate them. I'd like to be able to build a whole caravan of these exploited and heavily weighed down peons, ideally each one an individual, but for the moment this is the only one of his type that Reaper produces in their nice, cheap, plastic.

Wednesday, 4 December 2013

Hell hound.... on my trail

77038: Hell Hound, sculpted by Jason Weber for Reaper.
Next up in the Great Paintgasm of '13 is this cute little guy: Reaper's Bones 77038: Hell Hound. I think all that kerfuffle along its back is supposed to be flames, but I decided to paint them as bone spines, because that's just how I roll, folks. I live life on the edge. Also, I'm not entirely sure what the rows of studs at hips and shoulders are supposed to be... demonic shoulder-nipples, maybe? Anyway, I painted them as metal bolt heads or something.

The green colour scheme is less hell-houndy and more jungle-camoflagey, I think.

It was a quickie paint-job, and it does show a bit.

Monday, 2 December 2013

Hydra - progress

It's time for another update on my Mountain o' Reaper painting odyssey. Next up: the Hydra.


I quite like this sculpt, though I think it would be more useful as a tabletop gaming model if it were more compact — not smaller, exactly, but maybe curled around itself a little more.

I've airbrushed the whole thing in three brown shades, a cream yellow, followed by raw sienna, and finally burnt sienna. Then the whole shebang was given a dark sepia wash.


Now, on to the detail painting, starting with the heads. They're a little awkward to get at, being all cheek-by-jowl with each other, so I've begun with the open-mouthed one which is a little more separate than the others. I can experiment on it more easily, and then, when I've sorted out the colours and processes, I'll finish off all the others.


I'm reasonably happy with this head, so now... onwards and upwards!

Thursday, 28 November 2013

An Historic Achievement


We played a game of Star Trek Catan the other night, at which I lost utterly. That's not the historic achievement though; I usually lose at boardgames because I am the world's worst Player of Games.

The historic achievement is demonstrated by the unbroken string of red starships (they're mine) right across the board.

For the first time in my life, I managed to use up every single road (starship) in a game of Catan, creating an unassailable Longest Longest Road.

Alas, this came about mainly because I seldom had the resources to build anything but roads, but that's not the point. The point is...

LONGEST. LONGEST. ROAD.

Saturday, 23 November 2013

New Washes For Old

I use washes a lot when I'm painting figures. I use various experimental recipes of my own devising, but I also use commercially available washes a good deal — they have the virtue of predictability, which my own concoctions sometimes do not.

The wash I've used and liked the most is the old Citadel Devlan Mud. It's no longer available, having gone out of production a couple of years ago, so I'm having to find an acceptable replacement.

I've airbrush-primed this figure with Vallejo's polyurethane acrylic surface primer white, and then washed it in sections with three commercially available washes:

  • On the figure's left (front and back), the old Citadel Devlan Mud.
  • On the right-front, the new Citadel equivalent, Agrax Earthshade.
  • On the right-back, the nearest Vallejo equivalent I could find, their Umber Shade.

All of the washes were applied undiluted, straight from the pot (or bottle).

Visually, there's not a hell of a lot to choose between them. They all dried to a good matte finish.

  • Agrax Earthshade is the lightest, and it pools the least in open areas. Judging by the smell, it has an alcohol component. It's very similar in hue to Devlan Mud, and I quite like its lighter, looser fluidity.
  • Vallejo Umber Shade is a little bit thicker, and it pools a lot more on flat, open areas. It's a touch warmer in tone, but still pretty close in colour.

Of the two, I think I prefer the Citadel wash, but the Vallejo offering is certainly quite usable and I don't feel that it's money wasted.

Monday, 18 November 2013

Terrain: Roads

A couple of years ago I bought some resin terrain pieces at the annual CWS bring & buy. These were actually being sold as river pieces, but the "water" surface is actually quite lumpy and gritty, so I thought I'd finish them as dirt roads instead. The pack was $10.00, so about a buck per piece.

They're OK, as far as they go, but I think in future I'll just make roads out of pieces of paintable silicon caulk-impregnated fabric, which is both much cheaper and more flexible, and lies flatter on the table.

Friday, 15 November 2013

Laser-cut Casualty Markers

Continuing in my forays into the wild world of laser-cutting, I've designed these casualty markers designed for use with games like Hail Caesar, Pike & Shotte, Black Powder and so forth.

The idea is that they're used with standard 12mm six-sided dice to indicate the number of casualties a unit has taken thus far.

I've created them in two parts, as you can see at bottom-right: the base, pierced with a hole for the die, and a little collar. The bottom of the base would have some thin card glued to it, so that the die wouldn't just fall through if the base is picked up and moved.

What I haven't quite decided on just yet is precisely how I'm going to assemble them. I have two options in mind:

  1. As you can see in the example to the left of this unit of Peasant Rabble, the collar is used to deepen the recess for the die. This has the advantage that it makes it less likely that the die will fall out when the marker is being pushed around the table. Also, it means that there's room to create a little casualty mini-diorama on the other half of the base, which can look quite good on the table and makes the marker feel more like part of the battle scene.
  2. In the example to the right, the collar is mounted to one side of the hole pierced through the base, creating two shallow sockets instead of just one deep one. This has the advantage that two dice of different colours can be used, which can be useful for the morale mechanic used in the games I referred to earlier — in which the number of "casualties" can vary within a turn, with only casualties in excess of a unit's "shaken" morale value counting against them in a break test, after which those excess casualties go away. There's an added advantage that the marker can accommodate units with a higher morale value than 6 (though I could also do that with a d8 or d10, or even a d12).

I have a bunch of them cut already, so perhaps I'll just do some of each and see how they go.

It's dark in the dungeon...


Wednesday, 13 November 2013

Babau

I doodled away at this while I was watching some entirely unrelated TV show (Agents of SHIELD, as it happens).

It's a critter from the 1983 AD&D Monster Manual II, a minor demon called a Babau.

The thing is, I still think of anything out of the Monster Manual II as being a new-fangled, possibly suspect, creation that may or may not be worthy of inclusion in the hallowed precincts of D&D. I guess that's because the book didn't appear until I'd already been playing AD&D for a few years, and I didn't even see a copy until the very late '80s. By the time I saw it, TSR was in its death-throes and was putting out a hell of a lot of pot-boiler garbage.

I didn't finish its right hand; I got bored with drawing and stopped. I might finish it off some day, but I wouldn't count on it. It will certainly never get any taller, because I ran out of leg-room on the page.

Monday, 11 November 2013

New Old Character Sheet Design


I just found an old AD&D character sheet that I designed years and years ago. It was intended to be printed double-sided, laid out on A3 to be folded down to 4 A4 pages, the theory being that it would act not only as a character sheet, but also as a folder to hold all of the gajillions of scraps of paper players seem to inevitably end up with. It was designed when we were playing an AD&D 1e/2e hybrid, so it's not quite either 1e nor 2e.

It was originally drawn out in technical pen and photocopied, but I just spent a couple of hours converting it to a vector format in CorelDraw so that the resulting PDF file-size isn't too huge. If you use Acrobat's "booklet printing" feature, it will print in the intended foldable format, or you can just print it as separate pages. I've tried printing it on A4 paper (and thus ending up with an A5 booklet), and though small, it's still quite usable.

You can download it here if you want to take a closer look. It's about 163 KB.

Edit: This links to a more readable A5 version if you want to print it as an A5 booklet. All of the text has been reformatted to Helvetica — much easier to see.

Sunday, 10 November 2013

Sir Fnord the Pretty Darned Nifty

This is the figure I use to represent one of my oldest and most-played characters, Sir Fnord. It's a Grenadier figure I believe, or maybe Citadel — they were the two manufacturers I patronized most regularly back in the day. It was painted some years ago (maybe ten years? I'm not entirely sure) and since then some changes have made themselves manifest.

For a start, the static grass around his feet used to be green. Now it's a dead, arid tan, and the PVA it's stuck to is lifting away from the plastic base.

Also, his shield: I printed the blazon on my Epson inkjet printer on to photo paper, and then laminated the shield out of three sheets stuck together around a bottle (to get the curve) and then trimmed to heater-shield shape. The fleur-de-lis used to be black highlighted in blue; now those highlights have turned green as the cyan ink fades away. Eventually the highlight will be yellow.

Close-up photography is terribly unforgiving of paint jobs, which makes me all the more impressed at some of the work I see on sites like Cool Mini Or Not.

Tuesday, 5 November 2013

Laser Cutting


I've just recently been given access to a laser cutter, and the opportunity to try my hand at designing some stuff for production on it.

I did this little MDF cabin, with a lift-off roof, and some sabot bases for converting my skirmish-based 15mm infantry to use in Flames of War (should that ever be necessary). I just glue some magnetic sheet underneath and trim it flush with the MDF sabots, and Bob's your uncle — the washer-based infantry stay in there quite securely. I'm tempted to do the same for my medieval figures as well, so that I can easily transpose between Hail Caesar and DBA/DBM/HOTT/FoG.

At the moment it's all very simple stuff — proof of concept really, rather than a serious attempt. However, I'm learning already how to achieve what I'm aiming at, and now I'm ready to try my hand at something a bit more ambitious.

I'd like to have a laser cutter of my very own, but even though the price has come down drastically for small desktop models, they're still well out of my reach. Maybe one day.

Monday, 4 November 2013

Is that...? No! Yes? Maybe....

I'm beginning to feel those vague stirrings that indicate that maybe starting GMing again might not be entirely out of the question.

Then again, it might just be wind.

Friday, 1 November 2013

Kea-Griffon: Finished at last

Finished, at long last.
Not much different, visually, from the last WIP I posted, but now the wings have been faired in (badly) with the body.