Showing posts with label napoleonic. Show all posts

Sunday, 20 March 2022

6mm Napoleonic Brits (3d printed)


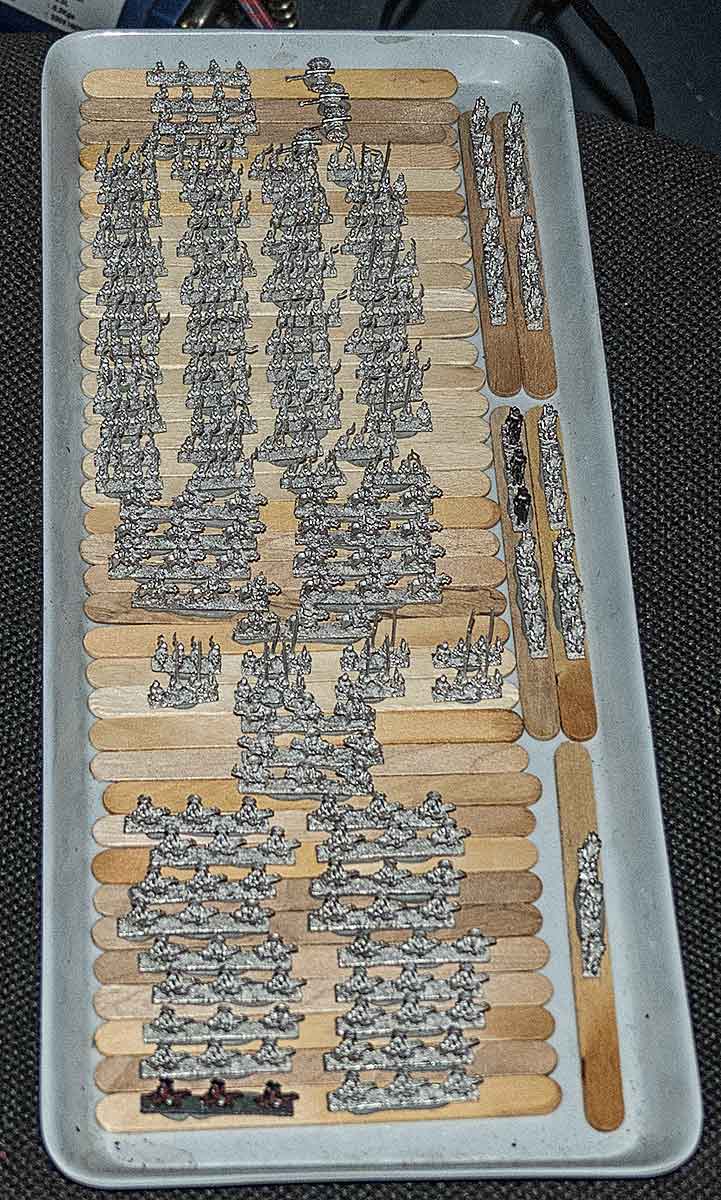
I've printed some of Henry Turner's 6-15mm Napoleonic British sculpts at 6mm on my Mars Pro, and made some 40mm two-rank sabot bases for them on my Ender 3. I like his proportions for 6mm, but I find them just a tad too chunky and dwarfish for 15mm.

At the moment only the front rank strips are glued in place; they'll be painted along with the base, while the rear rank strips will be painted separately and then be glued in place. The battalion colours will also be painted separately, and then be glued in place — the colour bearers' hands can be drilled out to accept a pin, and the colours themselves will be made of paper.

There have been a few casualties amongst the muskets and bayonets when I removed the printing supports, but never mind.


These five bases would make a full medium-sized battalion for Black Powder in 6mm. The left and right bases are half-and-half line troops, with the woolen puff epaulettes, and flank troops with the swallows-nest epaulettes. The difference is visible if you look really closely, but in this scale I think differentiating them in this way is largely pointless. Nevertheless, I've got them, so I might as well use them.

I've photographed them here with some Heroics & Ros 6mm Spaniards, on 3mm MDF bases, for comparison. They are more detailed than the H&R metals, but how much of that extra detail will be visible on the wargames table is yet to be seen. I guess it will depend a lot on the quality of one's eyesight, and mine is pretty crap these days.

Couple of days later...

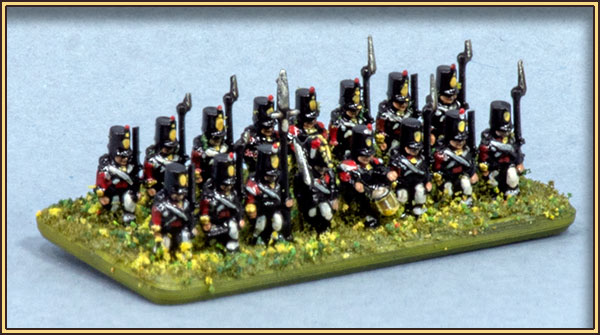
This is the first test base, painted and flocked. The 3d printed sabot base seems to have worked as planned; the ranks aren't perched up on little mounds as they would be if they were glued straight to a flat surface.

The figures are just block-painted over a black primer, and then sploshed with Army Painter Dark Tone which does successfully delineate a bit of the detail present in the prints — detail that will be only minimally visible at tabletop distances. It's not a painting standard that will reward close scrutiny, but they'll look okay en masse on the table.

These two strips suffered even more than most when I took the supports off, but hopefully the flags will distract from the missing bayonets.

There are a pair of colours still to go on this base; I'm waiting on some toner for my printer for those. Normally I'll print them to get some precision in the outlines, mount them on their pins, and then give the paper a bit of flowing contour and finish by painting in some shadow and highlights.

Thursday, 3 March 2022

More 3d Printed Napoleonics


These Frenchies are a freebie sample from MC Miniatures on wargaming3d.com.

They're described as "15mm w epic size", whatever that means. They are indeed pretty close to 15mm from foot to eye.

The British soldier alongside is a metal figure from a manufacturer I don't recall. It was sold as "15/18mm", and it's definitely nearer to 18 than 15mm. Too large for 15mm, too small for 20mm. They're nice enough figures, but neither fish nor fowl as far as scale goes.


I have a bit of a yen for Napoleonic horse-and-musket wargaming, but the sheer number of figures required has always put me off. I've made a start on a British Peninsular army of about 1810 vintage using  20mm plastic HaT figures, but progress on that has rather stalled. I haven't looked at them for a couple of years.


I speed-painted the single strip of Frenchmen and then slathered them with Army Painter Quickshade Dark Tone. This is an oil-based glossy varnish-stain, and I probably won't matte-coat them at all. I really don't mind small-scale Napoleonics being all shiny and glossy like toy soldiers, because that, after all, is what they are. The gloss varnish enhances the brightness of the colours, and compensates to a degree for the grubbiness that the stain leaves.

I know very little about the vast array of Napoleonic uniforms, so these have been painted largely by guess, though with reference to some pictures I found on the internet. If I got deeply into Napoleonic wargaming I'd probably start looking at reproducing specific regiments and what-not, but for the present I'm quite happy with generic crapauds.


Later...


I nabbed some STLs by a chap called Henry Turner from wargaming3d.com

This particular one is a freebie, and it is (of course) Napoleon Bonaparte.

Turner's figures are marketed as 6-15mm, and as supplied they seem to be about 7-8mm. Therefore they need to be rescaled to about 200% for 15mm, a fact of which I was unaware before I printed the first batch. You can see Napoleon's little Mini-Me in the front there.

Their proportions are probably better for 6mm than 15mm, as they tend to be rather dwarfish in stature — big heads and short legs, and a fairly chunky build. However, the detail stands well proud of the surface of the figure, which makes it quite easy to paint, and there's good facial detail which is always a help. Although their proportions aren't naturalistic, they do make for good, sturdy wargaming figures, and en masse and painted up I think they'll look fine.

In terms of modeling, I do prefer the MC Miniatures figures, but Turner has a much wider catalogue of Napoleonics to choose from.

And later still...


The strip bases of the MC Miniatures figures are all 28mm x 6.5mm x 1.5mm.

Simply gluing them to a flat group base would mean a lot of effort in basing, and would most likely mean that each rank would look like it was marching on top of a grassy mound of its own.

I whipped up this 30x30mm sabot base and printed it on my Ender 3. The ranks of figures sit down into the base so that their feet are much more nearly level with the ground, so there will be much less need for messing about with basing grout and the like — I could pretty much just paint the base and then go straight to flocking.

I did this base in three ranks, because of the French habit of attacking in column, but it does make the base quite crowded. I'll try another with just two ranks and see how that looks — if it's okay, apart from anything else, it will cut down on the amount of painting required per battalion by a third.


And here is the two-rank version of the base.

It's okay, but it definitely has less of the feeling of the attack column about it.

Friday, 14 August 2020

Napoleonic British Artillery

Airfix

HaT

I've just been sent some Airfix Royal Horse Artillery by a kindly soul, so that my Napoleonic Brits can have some guns to support them.

Here they are, compared with some HaT Rocket troops, who wore the same Light Dragoon uniforms.
The Airfix figures are smaller than the HaT models: the most upright of them is 25mm from the soles of his boots to the top of his crest, whereas a comparable HaT figure is 27mm. The Airfix figures are better detailed than the HaT, with crisper frogging, and some detail showing on the helmet band and cuffs. The crests of the Airfix helmets are also more 'woolly' looking, whereas the HaT crests are quite smooth.

Monday, 20 July 2020

The 91st of Foot (sort of, nearly)

I'm slogging along with my Peninsular War rosbifs, and making heavy going of it too. However, I'm very nearly done with my very first Black Powder battalion, with just the Light Company to finish for the left of the line. Even at this level of painting, they're taking forever — I don't seem to be able to just sit and paint for hour after hour as I used to.

The colours came from the WarFlags site, printed and over-painted, and I chose the 91st simply because their regimental colour matches the facing colour I'd already started painting. I don't actually know anything about the regiment beyond its existence, and to be honest, I don't really care that much. At this point, a generic British formation is all I'm after.
Note: I am informed that the 91st was actually a Scottish regiment, originally the 98th Argyllshire Highlanders, who wore kilts up until about 1809 (?)  Fortunately that's before my chosen period, just. But in any case, hopefully nobody too knowledgeable will look too closely.

These figures are all from a single box of HäT plastic 1/72 figures, which are the only cheap plastic ones I've found that wear the pre-Waterloo stovepipe shako. That's why part of the battalion are standing at shoulder arms, while the rest are marching merrily along — there aren't enough figures of either type in one box to do a whole battalion.

The situation is easier with the Strelets boxes, as each of their sprues are entirely of one type of figure, with a few minor differences so that the bases don't all look like robot-clones marching in lock-step. However, the Strelets sets are all in the later Belgic shako, and there are only half the number of figures per box (at the same price as the HäT box) — roughly enough for one battalion per box, with a few spares. The Strelets plastic feels a bit greasier than HäT's; hopefully after a good scrubbing in detergent the paint won't just fall off them.

I'll add a couple of 95th Riflemen on detachment to the Light Company, in homage to Sharpe, which I'm currently rewatching for the umpteenth time. I haven't yet decided how I'm going to base the Lights; whether to base them individually, and make a sabot for when they're in the line, whether to just put them on a 6-figure base like all the others, or to split the difference and put them on two 3-figure bases.

A bit later...

I decided to base my Light Bobs individually, and make 3d printed three-figure sabots for them.

The plastic figures are mounted on 12.5mm (½ inch) steel washers, and there are 5x1mm magnets inset in the bottom of each socket in the sabot base.

This way I can scatter them individually if they're out in skirmish order, or if I'm feeling lazy I can just leave them in their sabots.


Here are the two sabots alongside the other six-figure bases in a 3d printed half-battalion movement tray. Only the front rank of the Lights are painted as yet; the guys at the back are still in their black primer.

Next morning...

And this battalion is done. Now, on to the next, which I think will be kilted Scots, just to torture myself a bit. I need four battalions of foot for a complete Black Powder army; I expect I will be both ancient and irretrievably insane by the time I finish them all.


I've got a box of Strelets Highlanders in Attack primed with black gesso, ready to be painted. I've painted tartan before (see this old post) but never in this scale, and only on individual figures, not as a production line.

Thursday, 16 July 2020

Napoleonics II: The Revengening


These Strelets 1/72 Napoleonic British just arrived on my doorstep this morning, so that's the foot component of my Black Powder Brits taken care of. Still got to get horse and guns, but first things first.

I'm mounting them at six to a 40x40mm base, so each box is roughly one battalion, with a few spares.

In truth, I'm really more interested in the Peninsular War than the 100 Days period, but the only stovepipe-wearing cheap plastic 1/72 Brits I've found are one set from HaT, and though I like them as figures, there are fewer useful poses per box in the HaT set than in the Strelets boxes. I'll just have to live with the embarrassment of presenting grey trousers and Belgic shakos on the field of Talavera.


Later....

I had to go into town for another reason, so I stopped by our local model shop and picked up some packs of Italerei Napoleonics.

These are the 95th Rifles, the Greenjackets. They'll need their swords trimmed off all their rifles, as they seldom used them as bayonets.


Here we have the 11th Hussars


And these are the Scots Greys.

That'll see me sorted for cavalry for a while, though I don't have any lancers.

Friday, 15 July 2016

Next up... the scum of the earth

Now that the Spaniards are out of the way, it's time to move on to the British.

There are not as many of them as I'd thought, but there's still enough to be a somewhat daunting task.

They'll do three battalions of infantry, four of cavalry of various sorts, and four guns (representing four batteries). Plus, there are sets for Wellington (and staff), Hill (or maybe Picton — there's a top-hat present), and the idiot cavalryman whose name I've temporarily forgotten. Uxbridge, that's right.

I'll get them all primed black, and then tackle them one battalion at a time.

Thursday, 14 July 2016

Headless Horseman

One of my dragoons appears to have lost the top half of his head.

It's OK though; I don't think it will have much impact on his military usefulness.

And now that I see them close up, I notice that the guy on the left doesn't have a face.

Saturday, 9 July 2016

Last of the 6mm Spanish


Today I finished off the last of the Heroics & Ros 6mm Napoleonic Spanish that I got from the last Christchurch Wargaming Club bring-&-buy. I've had pretty long breaks between bouts of painting these things, because frankly, I find this production-line stuff pretty boring.

Once they're based up — this lot will make four or five bases of line infantry and twenty half-bases of skirmishers, and I have another four-base battalion of infantry and a couple of batteries of artillery already done — I'll get on and make a start on my Napoleonic British. I haven't done an accurate count, but I'd say there's probably about five or six times as many of those as I have Spanish, so it may take a wee while to finish them. And then I suppose I'll have to get some French, since otherwise they'll all just have to fight amongst themselves.

I'm basing them on 40 x 20 mm MDF bases, with the intention of using them with the Black Powder rules. I'm casting my mind back, and I do believe that I've actually never done any Napoleonic gaming at all, so it's probably about time.

Later....

Turns out they're not the last of the Spanish. I found some cavalry that I'd overlooked; a couple of packs of lancers and dragoons. So, now I have to find out what they looked like so I can paint them.

Later still....

I've based up this lot, and they're shown here with one of the skirmisher stands out in front.

The flags are somewhat huge; I've exaggerated the size so that my decrepit eyes can distinguish them on the wargames table. They're images downloaded from the internet, printed on my laser printer, and glued to brass pins stuck into the MDF base. I added a little bit of gold paint and some shading.

And even later than that....

These are the cavalry I found, now painted and almost ready to go. At the back we have dragoons, the Villa Viciosa, and in front lancers, the Voluntarios de España. Though perhaps, considering the level of my knowledge of these things, we should just call them Yellow and Green Horsey-men.

Because it's winter here, my workroom is bloody cold. That means that everything takes longer: glue dries more slowly, varnish dries more slowly, and therefore basing these guys properly is going to be spread over a couple of days instead of hours. I had to brush the Villa Viciosa pretty vigorously because the flock was sticking a bit to their varnish, which is not as well cured as I thought it was, so I've delayed flocking the Voluntarios until later — I've brought them all into the warm, hopefully to accelerate the process a bit.

Monday, 14 September 2015

Lilliputian Armies: the Spanish

I've made a start on the 1:300 Napoleonics I got a couple of weeks ago. There are a lot still to do, but at least it's a nibble into a fairly hefty pie of teensy-tiny-soldiery goodness. These ones are Spaniards, and there's another battalion or two of Spanish infantry still to come, along with a few squadrons of cavalry, but the bulk of the lot are British — I'd say about three or four times as many as I have Spanish, though I haven't done an exact count.

I've made my dislike of production-line painting abundantly clear in the past, but in this scale you can really churn them out if you set your mind to it. The colour schemes need to be simplified somewhat; there's really no point in painting every cartridge box or bayonet scabbard a new colour as it just ends up looking confusing. You can afford to be a bit impressionistic in this scale.

I ended up basing the guns individually on 20 x 20 mm bases for the sake of flexibility: they'll slot nicely into the corners of a battalion square this way. I don't have enough artillerymen to provide full crews for each gun, so most of them just have three men as a token crew; that's fine, they look OK to my eye. I've only got three limbers, but frankly if I find myself having to gallop more than a third of my guns around the battlefield at any one time, I'm probably in deep trouble.

Monday, 7 September 2015

6mm Spanish - test base

A few of the 6mm H&R Napoleonic Spaniards I got recently were already painted, so I thought I'd make use of them to test out a proposed basing option. Here they are, along with trusty 28mm Sergeant Measureby, for scale.

The base size is 40 x 20 x 3 mm, which lets me mount two ranks, each of two strips of infantry without having to separate them and glue them individually, which is, in this scale, a pain in the arse to be frank. I did consider 20 x 20 mm bases, but most of the time they'd just be more fiddly than they're worth on the wargaming table. 40 x 40 bases were another option, but I'd have to base the troops in at least three, and probably four ranks or else they'd look lost in the middle of a vast plinth. I'd consider 40 x 40 mm bases for units that never go below three or four ranks (pike blocks, for example), but I prefer two-rank basing, which I can stack for attack column formations as needed.

This size base will allow 6 cavalry abreast, and probably two guns to represent a battery, though I may yet go to individual guns on 20 x 20 mm bases..

A 3mm thick base looks pretty massive for figures this small, but it makes the individual bases handleable without having to smush the figures up. These tiny troops are very easy to bend or break at the ankles, so utility triumphs over æsthetics for my purposes. Another advantage of the thicker base is that I can glue printed paper strips with unit information to the back, if I so desire.

Friday, 28 September 2012

Plastic Riflemen

The 1/72 (20mm) plastic Peninsular War British set from HäT includes a bunch of spare heads, some wearing the Waterloo-era Belgic shako, and others (more useful from my point of view) wearing the tapered Light Infantry shako with the bugle badge of the 95th Rifles.

That makes the set much more useful, since with a simple head-swap, a bayonetectomy and a green paint-job instead of red, I can field some skirmishers to screen my nicely ranked line companies. It also increases the wargame-worthy poses in the set quite substantially, though there are still a reasonable number that I wouldn't use, myself.

There are some detail differences between the uniforms of the Line regiments and the Rifles apart from the different shakos; the Rifles should be wearing pantaloons and spats rather than the cuffed trousers these figures have on. Their jacket cuffs should be pointed, and the jacket buttons are differently arranged. Fortunately, I am not anal enough for any of that to matter to me, so all I need to do is paint them to suit.

I flailed around for quite a while trying to find an appropriate dark green for the Rifle uniform; Most of my Vallejo paints are rather too camouflagey in tone, quite unlike the dark bottle-green the Rifles wore. I eventually settled on this one: Vallejo Game Color 72.147 (Heavy Blackgreen). It's not perfect, but it looks OK to my eye, and very much better than any of the camo greens I'd tried.

Sunday, 16 September 2012

18mm "Man at War" Napoleonics

I've bought myself some more toy soldiers, because I clearly didn't have enough toy soldiers. It's not entirely my fault; I was led astray by Evil Companions. Honest.

Anyway. I bought a box of Waterloo-era Napoleonic British infantry by Man at War for their "Napoleon at War" game — which may have been a bad idea, when it comes to mixing and matching them with figures from other manufacturers. They're described as "15/18mm scale" and measure 18mm from foot to eyebrows, which would make them giants of men among actual 15mm figures. Never mind; if it comes to the crunch I'll call them Guards or something.

As far as sculpting goes, they're not too bad. Not the best I've seen, but far from being the worst. The picture shows an unpainted and painted version of the same figure (almost the same — the unpainted guy is a flank company soldier, with the swallows-nest epaulettes, while the painted one is from a centre company. The epaulettes are the only real difference... though the flank company guy seems a trifle taller).

The figures don't need a great deal of cleaning up, but there is some to be done. They're moulded in a very soft alloy, and a lot of them arrived with their muskets wrapped around themselves like cthulhoid tentacles, so they need to be carefully straightened out. Also, there tends to be quite a bit of roughness around the somewhat massively chunky bayonets that needs to be trimmed off. As usual, there are some visible mould lines to be smoothed away, and that's about it for the pre-painting clean-up.

The test figure I did (to work out a reasonable production-line paint process) painted up pretty easily. The detail on the figures is well delineated without being too chunky, which eases painting enormously — tiny figures with in-scale lacing, frogging and what-not can be a bit of a trial to paint for the wargames table, in my opinion; I like a bit of "colouring book" help to speed things along.

The box includes plastic bases designed to hold 4 figures, for the Napoleon at War game system. I may replace those with MDF bases, since I prefer square-cornered bases to rounded ones for formation-based games like this. Ideally I'd like to mount them on 2mm MDF, but if need be, I'll go to 3mm.

Sunday, 9 September 2012

Borodino 2012

This weekend, over two days, the Christchurch Cavaliers (a local wargaming club) staged a massive re-fight of the Battle of Borodino in 28mm, using a somewhat modified version of the Black Powder rules.

I only saw part of the last couple of hours. The photos here (taken with my camera, so not great quality) really don't do justice to the awesome splendour of this game.

By the time I left, things were looking decidedly dicey for the Russians, with the almost total collapse of the centre-left and the loss of the Grand redoubt.


There are a couple of much better reports at Craig's Wargaming Blog and Rebel Barracks, with much more information and better pictures.

Thursday, 24 May 2012

Maybe it's not for me after all


I started painting these guys... how long ago? Some time ago. Somehow, considering the time elapsed between starting and finishing this lot, I doubt that a complete Peninsular War British wargaming army is in my future unless I win Lotto and buy one ready-made.

They're soft plastic 20mm figures from HäT. They're not bad for the purpose, and cheap compared with metals (or the hard plastic 28mm figures from the Perries and the like) but out of the 60-odd figures on the sprues, these 16 are about all that I found generally useful; the rest are all in non-wargame-worthy poses and pretty much useless to me. I would rather have just had four sprues entirely of marching dudes, and one of sergeants, officers, standard bearers, musicians and so forth.

Friday, 8 October 2010

The New Order

I've completed the new cardboard paint-rack I was working on, and used the opportunity to reorganise my modelling bench work-space a bit.


It doesn't look much more organised than it did before, but believe me, it is. Not only because I have a new paint rack, and not only because I've tidied up a bit, but because my friend Gold gave me one of these kitset MDF tool racks. He didn't have the construction instructions for it, so putting it together was a bit like working out one of those annoying 3d jig-saw puzzles, but I eventually managed to figure it out.

I've been making (very slow) progress on painting some of the HäT plastic 20mm British Peninsular War infantry I mentioned a little while ago. I've been finding it a bit of a hard slog; the painting method (working up from a black undercoat) is new to me, and I spent a bit of time floundering about to find a decent way to do the white uniform trousers decently — a Vallejo Iraqui Sand undercoat did the trick; grey looked too dark and harsh.


This is as far as I've got in the last month or so, at this rate it will take quite a while before I have an army's worth of figures painted and based. I am getting a little bit faster though.

I've always been a metal-figure man, and I still think metal figures are more tactilely satistfying as well as having generally sharper detail, but I have to confess that plastic figures have some significant advantages. They're much, much cheaper for a start, and that's no small consideration when it comes to building large armies. They're light and durable — again a big advantage when it comes to large armies; humping hundreds of lead miniatures around can be a groin-straining exercise, and metal figures are notoriously fragile when they clatter around against each other.

And one last thing — they make basing easier. That may seem a small thing, but disguising the stands of metal figures with putty and what-not can absorb a surprising amount of time and effort. With plastics, I can just use a small soldering iron to melt the figure stands out, merging them with the base material (I'm using 3mm MDF here). You can see the raw, unpainted, smooshed-out basing in the stand on the left; the other two have been painted over. I'll probably flock the bases, but they would serve quite well in paint just as they are.

Tuesday, 7 September 2010

Experimental block painting

These are 20mm plastic HäT Peninsular War British troops. I've been experimenting with a style of painting for wargames figures I've seen around quite a bit, but which I've never actually tried myself. I don't really know much about Napoleonic uniforms; these guys have just been painted to more or less match the picture on the box they came in.

The one on the left (I'll call him Figure A) has been block-painted and then shaded with one of the Citadel washes — Devlan Mud in fact. This is the method I've been using on my WWII figures, and it works well enough for that. The method has the virtue of speed, and it doesn't look absolutely terrible (OK, it does look fairly terrible) but it does look rather flat and the wash has muddied the colours a bit. It's a process that really needs the sharper detail of metal figures to work well.

The one on the right (Figure B) is the New Method (that's the Old Method to many, many figure painters). He's has been painted solid black, and then blocks of colour added over the top, leaving black outlines between and to denote creases and the like. The flesh and trousers have also had some highlights painted in. It is slower than the block-and-wash method, but not cripplingly so, and the results are a lot crisper and the figures look better at arm's length (tabletop distance) than the other. Close up it looks pretty messy, but after all wargames figures aren't diorama figures, and the exaggerated shadow and highlight works well for the purpose.

I like the results of Figure B a lot, and I think I'll do more of it. I'll have to practice my creases though; I tend to guess a bit about how fabric falls rather than referring to live or photographic references.

Note: You can click on the picture to see a larger version of course, but the small thumbnail shown is closer to what the little 20mm figures look like in real life.