This is a somewhat fraught subject, and there are people out there who take their own opinions very, very seriously. I suspect that they're very angry people at heart, and need to chill a bit, but anyway.
The main thing to remember is that the numbers used to describe miniature figure size and model scale are quite different, and bear only a passing relationship to each other. A purportedly 15mm figure might be anywhere from 12mm to 18mm or worse, but a 1/72 scale model will (or should) always be in a proportion of one real-world centimetre to 72 scale centimetres.
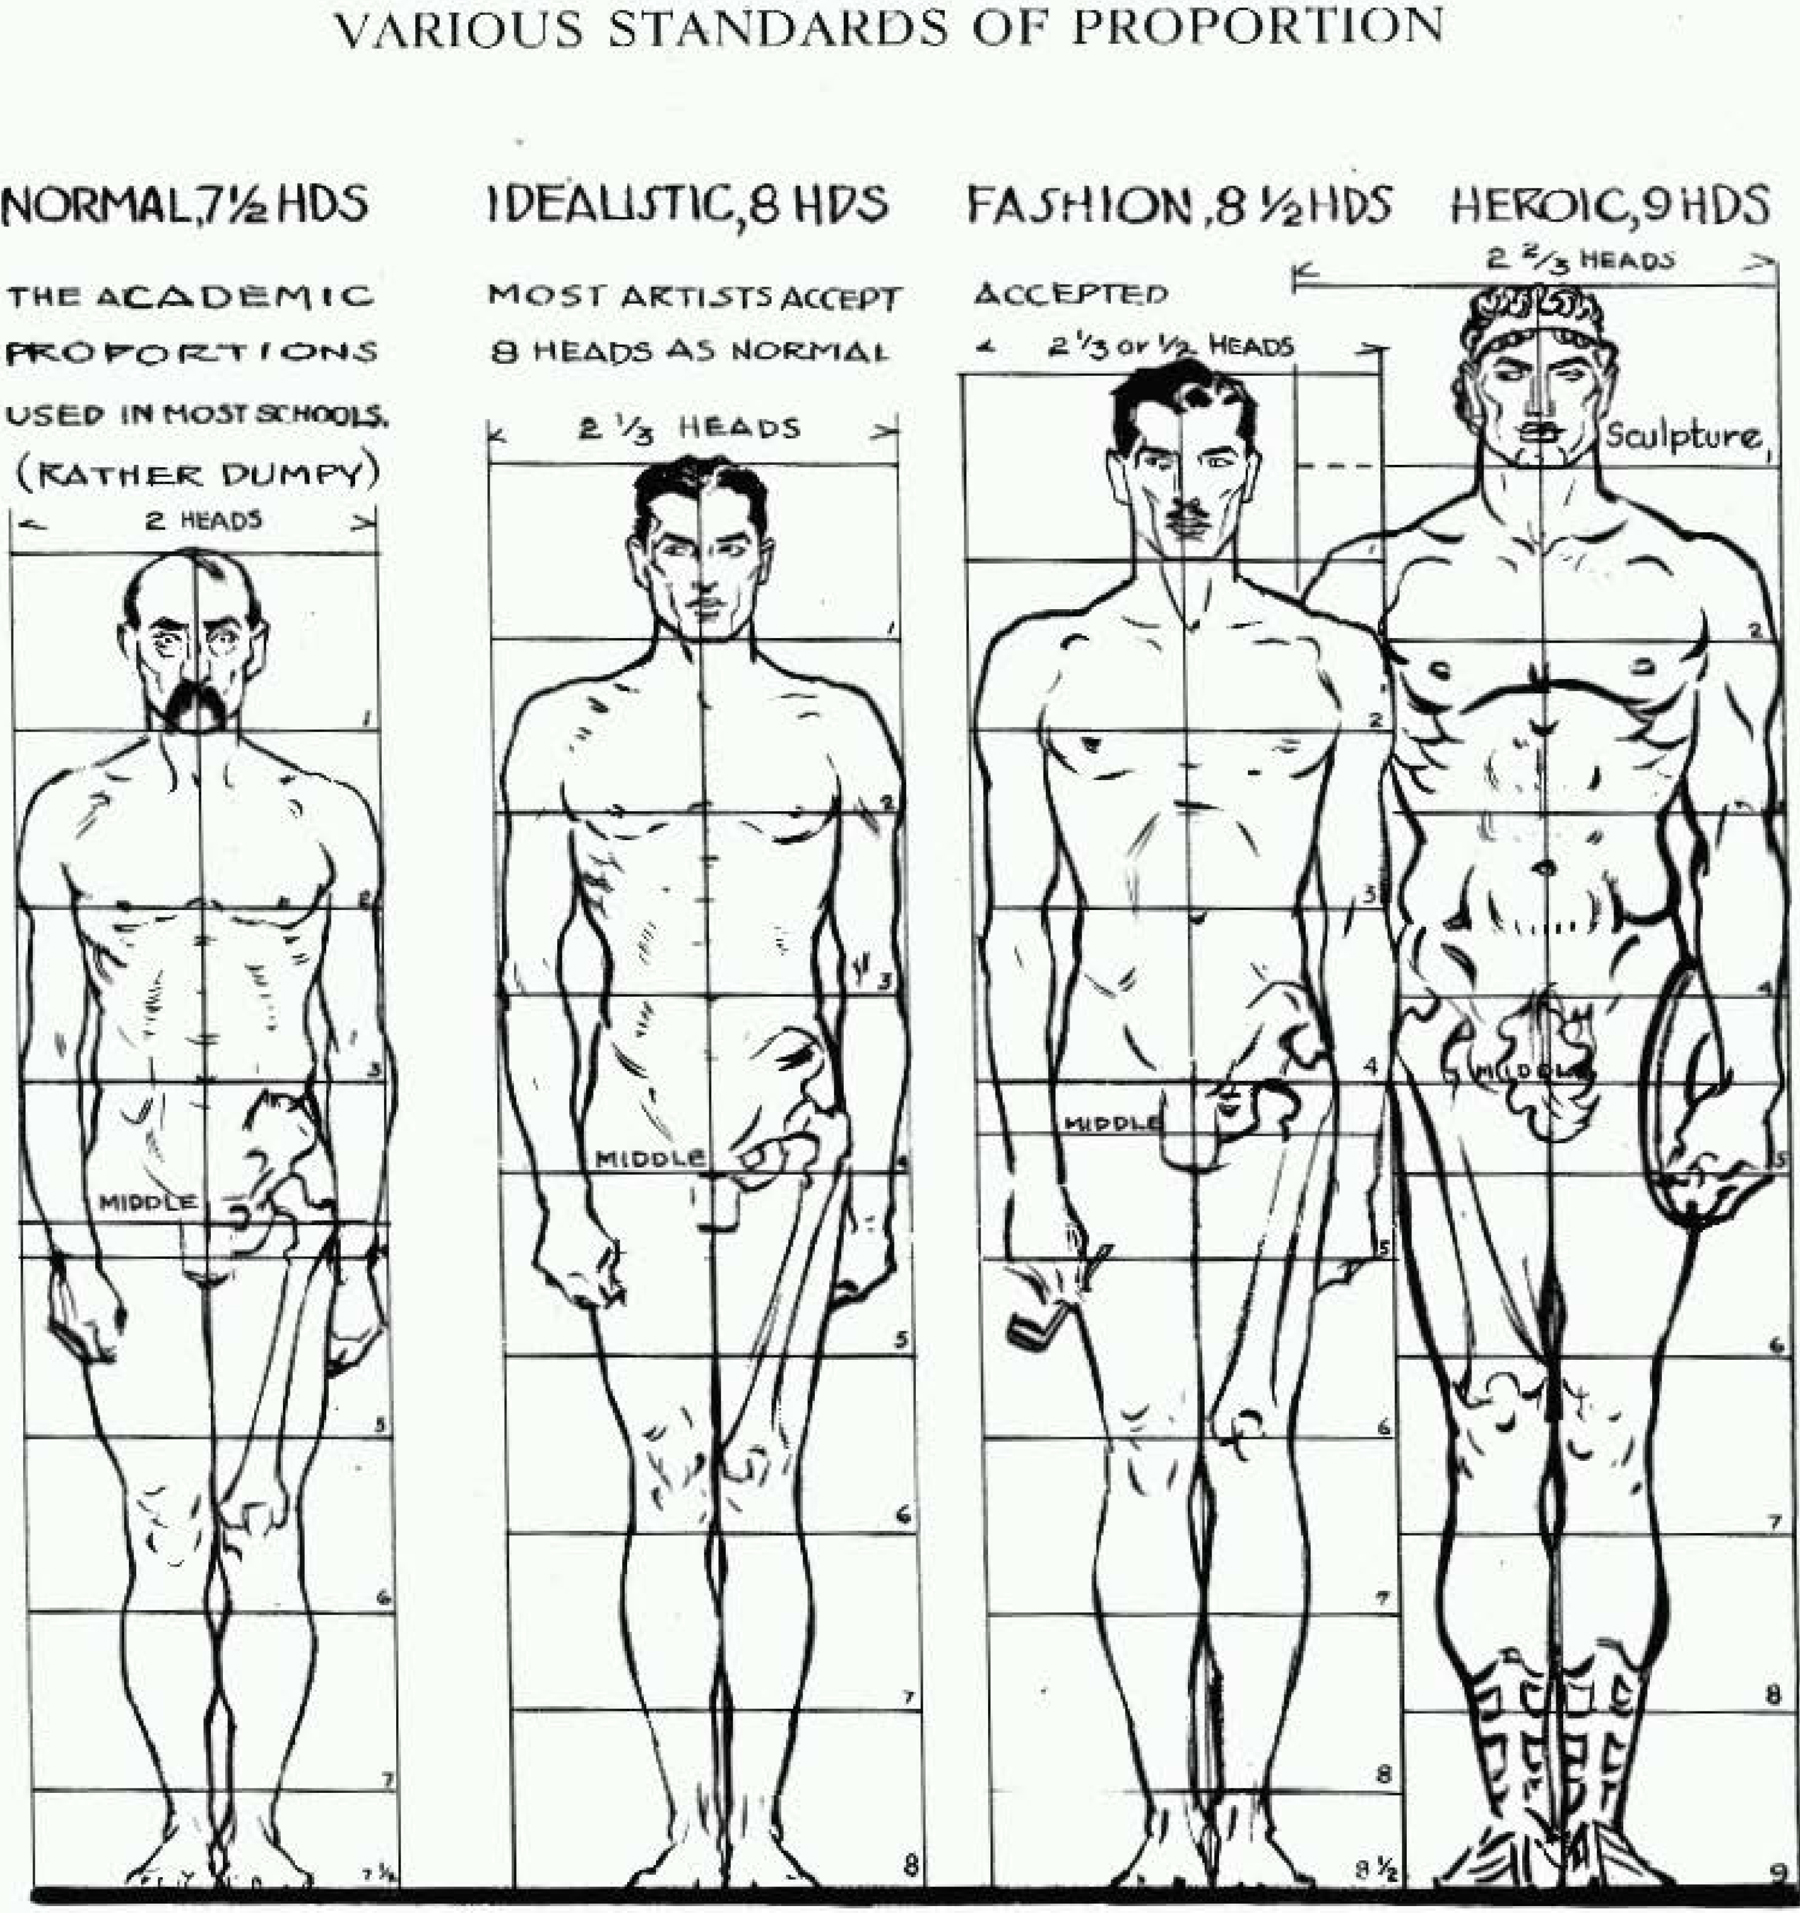
This image is from Andrew Loomis' famous work on figure drawing, Figure Drawing For All Its Worth.
It's a very influential work for illustrators, but its main purpose here is to give us some proportions to work with.
Loomis describes the normal male as being 7½ heads tall, which is a handy starting point as it's independent of any actual measurements. However, thanks to the magic of the internet, we can tie it to some real-world figures — it turns out that the global mean male height is 171cm (5'7⅓"). Therefore, the mean height of one head is 22.8cm, for what that's worth.
Miniature figure size is generally agreed to be measured from the soles of the feet to the eyes*, thus allowing us to ignore any tall fancy hats or the like. The eyes are half way up the head, which handily allows us to ignore the ½-head and declare that our mean male miniature figure's eye height will, in scale, be 159.6cm, which, for ease of calculation, we can safely round out to 160cm (5'3").
* Though remember those angry people who take themselves far too seriously. They may have other ideas.
Phew.
So anyway, now that we know all that we can work out which model scales and figure sizes should go together visually:
| Model Scale |
Scale Figure Eye-Height (mm) |
Standard Miniature Size |
|---|---|---|
| 1:300 | 5.3 | 6mm |
| 1:285 | 5.6 | 6mm |
| 1:200 | 8 | 8mm |
| 1:144 | 11.1 | 12mm |
| 1:100 | 16 | 15mm |
| 1:76 | 21 | 20mm |
| 1:72 | 22 | 20mm |
| 1:64 | 25 | 25mm |
| 1:56 | 28.6 | 28mm |
| 1:48 | 33.3 | 32mm |
| 1:35 | 45.7 | 45mm |
| 1:32 | 50 | 54mm |
| 1:24 | 66.7 | 70mm |
| 1:12 | 133.3 | 130mm |
These are not, of course, hard and fast rules. There are many people, for example, who use 1:48 scale vehicles with their 28mm miniatures, just because they think they look better. And 25mm figures are often used with 1:72 scale vehicles, mainly (I think) out of tradition. More power to them; they're their models, and they can do with them as they please and it will harm me not one whit.
A Note on Figure Sculpting
The proportions given by Loomis may not be entirely suitable for figures sculpted for gaming use, especially in the smaller scales. Often, elements like heads and hands will need to be sculpted slightly larger than would be strictly accurate, and limbs may need to be thicker just to stand up to the rigours of handling.
There is some natural variation in the size of real human beings, and there's nothing wrong with reflecting this within a unit of little army-men. Different sculptors may create their figures at slightly different sizes than other sculptors, and mixing figure ranges can create some pleasing height variation.
BUT items of equipment like rifles, webbing, ammo boxes and so forth do NOT vary in this way, and if two figure ranges have visually differently sized rifles, for example, then when mixed together they will just look wrong and wonky.