Friday, 21 October 2022

Old Sherman, New Paint


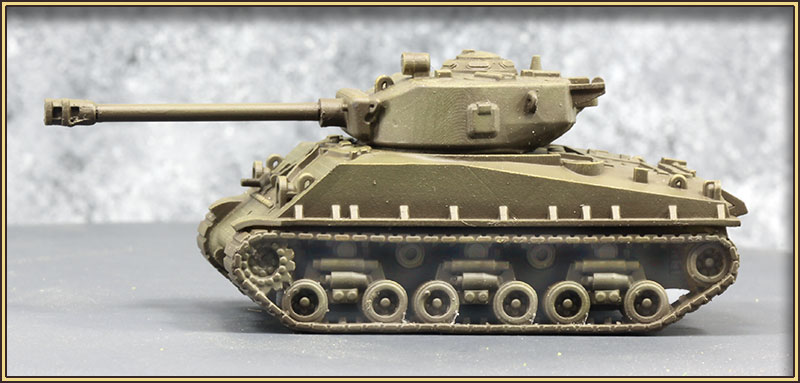
This is a Sherman I I printed on my Ender 3 FDM printer a couple or three of years ago.

I believe that with the turret bustle and sand skirts it wasn't used in this configuration by the Americans, and in fact I originally printed it for my North African Brits. However, I wanted to try out a test paint for US olive drab, and I created the markings with masking tape instead of decals.

It's an okay enough model for wargaming purposes, but even so the layer lines are apparent enough that I don't print vehicles in FDM any more, and reserve that printer for terrain and utility bits and pieces. Vehicles and figures I now print in resin on my Mars Pro.

Monday, 17 October 2022

Challenger (finished)


Here's the WWII British Challenger 17-pounder gun tank in 1:100 scale that I posted a WiP for earlier.

I tried a new (to me) three-layer method of painting mud and filth, with which I'm fairly happy. I first painted a couple of layers of loose, sloppy, thinned blotches of VMC Earth all over the running gear, and on the hull where I wanted mud splashes, before washing the whole model with Citadel Agrax Earthshade. Then, over the top of that, I sponged speckles of VMC German Camo Beige. I also sponged it, very very lightly, on other places on the hull and turret.

Saturday, 15 October 2022

Challenger (in progress)


Next project is a 15mm (1:100) Challenger. Not the modern Challenger, the descendent of Chieftain, but the WWII Challenger, the 17 pounder variant of the Cromwell. Once again I made the gun barrel from a length of 2mm brass rod, tapered down and provided with locating pins on my cheap (and fairly pathetic) little mini-lathe. I would have liked to have been able to turn the muzzle-brake in place rather than having to glue on a separate piece, but my lathe isn't anywhere near that precise.


I have printed this model by the estimable Mr Bergman before, in FDM, but at that time my Ender 3 printer was in the process of crapping itself, and I got a bit of layer shifting. I've thrown this print away now.

As it turned out, while I was looking for the Cromwell (below) I discovered that I'd printed another FDM Challenger more successfully, and completely forgotten about it, so I've got a couple of Challengers available on the very small chance that I'll ever need more than one for any game I'll be playing.


I wanted to see how the Challenger looked alongside the Cromwell, in this case a 1:100 PSC plastic kit. It's certainly quite stretched out, and it's tall compared with the Cromwell, but it wouldn't be any taller than a Sherman Firefly, the Brits' other 17pdr gun tank option at the time.

I've primed the Challenger model with Vallejo British Bronze Green surface primer.

The Challenger was intended to work with Cromwell troops, and by being built on what was essentially a lengthened Cromwell chassis, to minimise the logistics impact of having two different types working in the same unit. Also, the Cromwell was a pretty speedy tank, and the Firefly would have had quite a job to keep up with them. Not to mention that a Firefly would stand out to enemy observation even more in a Cromwell troop than they did with other Shermans.


The next stage is to apply the top coat, ready for markings and weathering.

The colour I use for late-war British stuff is VMC Russian Uniform, and it's applied by airbrush one panel at a time. I'm not aiming at even, solid coating, but rather apply the paint in a sort of mottle pattern from the centre of each panel out to near the edge, building it up in thin layers until it looks okay.

The panel edges are then highlighted by dry-brushing with VMC Buff.

Decals and/or markings will go on before any further weathering, so that they don't look too bright at the end of the process.

The finished piece can be seen here.

Saturday, 1 October 2022

Sherman's Bendy Barrel


An issue that arises all too often when printing models in resin is warping of components. Gun barrels are especially problematic in this way. I don't know if the issue is with the resin itself, or my printing settings, but resin prints don't seem to have the dimensional stability that FDM has. I assume it's probably the resin layers shrinking microscopically while curing.

I printed this M4A3E8 a few days ago, and I've just started painting it. I don't know if the warping of the gun barrel has actually got worse, or whether it's just preying on my mind, but in any case I've decided that it just can't be borne any longer.

I have some 2mm brass rod, and a little cheap mini-lathe that I got from AliExpress — it's basically just a Jacobs chuck attached to a little electric motor on an aluminium frame — so I've decided to have a go at replacing the gun barrel with a nice straight brass one. The 2mm rod is out of scale for the 76mm gun, but it's the same size as the barrel as designed, so at least I can be sure that the muzzle brake isn't going to suddenly look too hugeous.

The new turned barrel (a bit out of focus) is sitting in front of the model. Cutting off the muzzle brake and barrel should be straightforward enough with a razor saw; I'll just have to be a bit careful with the drilling for the brass tenons to slot into.

Something the lathe doesn't have is any kind of tool holder, so it all has to be done with hand-held tools. Not ideal, and it makes getting crisp, straight, square angles a bit tricky. Hey-ho, needs must as they say.

Later on...


Well, at least it's straight now

I see from the photos that there are a bunch of tiny supports in the running gear that I overlooked, so I guess there will be more disruption of the paintwork than I'd hoped. I'll start again from the beginning I guess.


A few days later...

This is about where I give up trying to paint it any more. I was trying for a tank that looked well used, but without all the chipping that tends to be splattered all over tank models these days (and of which I am as guilty as any).I've ended up with a bit of a mess, but it will do okay at tabletop distances I think.

The decals come from Skytrex, and they seem pretty good to me. They respond well to decal softener without becoming so fragile that they fall to bits, and the multi-colour ones I bought (German crosses) are printed in good registration, unlike any of the Battlefront decals I've had.

Wednesday, 28 September 2022

Ostwind 37mm Flakpanzer


This is a 1:100 scale (15mm) German WWII  Ostwind 37mm Flakpanzer, printed on my Mars Pro from a model by M. Bergman (I think).

I'd normally add some crewmen in an open-topped vehicle, but the fighting compartment of this one is too tight to get any in there. I think I would have to add them digitally and print them in place.

Sherman bits


 Zac Kavulich (TigerAce1945) released some time ago a pack of various marks of Shermans for WWII 15mm printing. Unlike Bergman's models, Zac's models were presented with separate running gear and hulls.

I took one of his track modules and decided to up-detail it a bit — not a lot, just enough to satisfy my 1:100 scale wargaming model sensibilities.


I got this far along when I realized that

  1. it would have been easier, and I would have been better off starting modeling from scratch, and
  2. I'd come far enough that stopping now and starting again would feel like a huge waste of effort.

So I kept going.


This is the end result. There's absolutely no detail on the far side, as my aim is largely ease of printing, and I thought a completely flat rear face would also make it easier and stronger to glue to the hull.

There's more that I could have done, but this seemed to me to be sufficient detailing for my purposes. Fortunately, an STL can just be mirrored in the slicer, so there's no real need to make separate models for something like a port and starboard track run.


The test prints worked out okay, but this is why I don't much like printing components separately in resin. It's just not very dimensionally stable, and I always get warping of pieces like this, to one extent or another.

Fortunately the warping here isn't so extreme that I won't (probably) be able to keep them flat against the hull with glue. Fingers crossed. They were certainly easier to print than they would have been had I done them as a single piece with the hull.

Sunday, 11 September 2022

Modeling U.S. Olive Drab — harder than I expected


WWII U.S. Olive Drab should be simple, but it's really not.

It was composed of just two pigments: ochre and black. However, the word "ochre" is not a precise one at all.

In his Military Modelling magazine article back in 2002, Steve Zaloga went into the subject in reasonable depth, and the pre-mixed colour he recommended above all others back then was Tamiya XF-62, with no others even coming close to the WWII-era paint chips he was comparing against.

I figured that mixing it from VMC acrylics would just be a matter of getting the right proportions of yellow ochre and black, but all of those mixes ended up much more grey than the sample swatch of XF-62 I sprayed, which has a perceptibly warm brown cast. Of them all, the 3:2 yellow ochre : black mix seems to be closest in tone, but as I said, it's too grey.

The Vallejo surface primer described as "US Olive Drab" is actually much closer to the 5:1 mix, which is a long way from XF-62, and a long way from WWII colour photographs I've seen.

The search continues.


A bit later...

I found a bottle of VMC 889 USA Olive Drab, which is much browner than the Tamiya, more like a burnt umber. However, it might do okay as a base coat, with panel shading airbrushed over the top in 887 Brown Violet, which was recommended to me. The 887 is pretty good in hue, though it's considerably lighter in tone, which is probably a good thing when it comes to scale effects and the general effect of dust and sun on the paint.


Even later...

I tried a base coat of 889 Olive Drab, highlighted with the airbrush with 887 Brown Violet, and it gave me a result I quite like. So I think this will be my process for US equipment, which might come in handy for  Battlegroup:Westwall when it finally appears.

I did the stars with Tamiya masking tape, laboriously cut out with a scalpel, and if somebody was to provide sheets of die-cut masking tape stars and roundels, that person would get my money. Oh yes they would.

The model is actually a British Mk.I with sand shields and turret bustle, so not 100% right, but it'll do me for testing purposes. When I need them, I'll print some proper Yank tanks.


Much later....

It's probably a bit pointless, since I've found some pre-mixed paints that work for me, but I thought I'd try a mix with a different ochre and see how that turned out.

In this case, I used Maimeri Polycolor (gouache acrylic) Raw Sienna and Black, and got tones that seem a lot less grey than those I got with yellow ochre. The proportions are quite tricky to manage with tube acrylics though, especially with small quantities of paint.

The left-hand swatch is roughly 1:1, but the others are all rather indeterminate. I think the right-hand one is around 4:1, but I'm really just guessing.


And even later...

I've discovered that Vallejo already do a pre-mixed US Olive Drab in their ModelAir range (#71043 Olive Drab) which is just about perfect.

And not only that, but I already had a bottle of it in my Big Pile O' Paints.

So, that was a whole lot of wasted effort.

Saturday, 10 September 2022

Marmon-Herrington MTLS 1GI4 (15mm)

 Here's a fairly obscure little WWII tank — the Marmon-Herrington MTLS 1GI4 in 1:100 (15mm) scale.

This is one of those projects I started and then forgot about, so it's taken a very long time to finish.

I've put the STLs up at https://www.wargaming3d.com/.../marmon-herrington-mtls-1gi4/


Thursday, 1 September 2022

Secondary Skills in AD&D(1e)

 I've spoken before about the two-edged sword that is a formalised skills system in any TTRPG.

The mere existence of a list of available skills tends to guide both players and game masters towards the attitude that if a character doesn't have a specific skill written down on their character sheet, then they just can't do that thing.

Also, a formalised skill resolution system has a tendency to replace imagination and roleplaying with a simple mechanical die roll — boring!

Nevertheless, people persist in desiring lists of skills, worked out in excruciating detail, for their characters to pick and choose from. I suppose it makes them feel safer or something.


AD&D (1e) has no formal skill lists or skill resolution system. The nearest it comes to it is the presence in the DMG, on page 12, is a list of "Non-Professional Skills", or Secondary skills.

They're not detailed in any way except for being named, and in theory at least, they're assigned randomly at character creation.

In terms of function, they're intended to act much more like the character backgrounds used in D&D (5e) than as a definitive list of skills, and when used that way, as a flavourful adjunct to the character rather than as a mechanically defining feature, they work well enough. The key is to use them properly.

Let's take, as an example, the entry for d% 55-57 — Teamster/freighter. Boo! Boring!

A character with this background would have a working knowledge of a wide range of skills. They would need to know how to manage and care for draught animals like oxen or horses for a start. They would need to know how to maintain and drive wagons and maybe barges. They'd have needed sufficient leather and wood working skills to keep their transportation working. They would need to know how to balance and secure their loads, so they'd be familiar with knots and nets and the like. They'd have had to move heavy objects about, so they may well be familiar with the construction and use of impromptu gantries, and they'd be aware of the benefits of pulley systems for mechanical advantage. They'd have to have been adept at judging the lie of the land ahead, to avoid (if possible) steep slopes or deep rivers or other obstacles, and if unavoidable, how to get their wagons over them. And once they'd got their load to its destination, they may well have needed a familiarity with licences, docking fees, bureaucracy and bribes to get it into a town or city to be offloaded.

I have undoubtedly missed or forgotten much that would be relevant, but you can easily see how this simple one-line entry can really flesh out the assumed knowledge of the character, knowledge that could be applied in all sorts of situations.

When it comes to applying this knowledge in the game, the onus is on both the GM and the player to bring it to the fore — the player will doubtless want to stretch definitions to breaking point when it comes to taking advantage of it, and the GM's job there is, for the most part, to say "Yes, okay" unless the justification is patently ridiculous, in which case a simple "What? Are you serious? Come on, get real and pull your head in" will suffice.

Most of the time, a die roll for success or failure will be unnecessary; the character is supposed to know this stuff. At most, you might want (for dramatic purposes) to determine how long something takes, or how well (or badly) it was done, and that sort of determination is easily made on the fly. A formal resolution system is almost never necessary.


If a die roll is deemed useful, I would suggest that 3d6 is the best option as it gives a decent bell curve with a minimum of fuss. If it's being used to determine the quality of a result, then a result of 9-12 would be dead average: the higher the number above that range, the better the employment of the character's knowledge and skill, and vice-versa for a result below 9. If it's used to determine time taken, then the GM must first imagine what would be a normal average time to do the task, and then use the position on the bell curve to determine whether the performance is faster or slower than usual, and by how much. I would read the result from left to right, with a 3 being grindingly slow and an 18 blisteringly fast, but that, as always, is really up to the individual GM.

Friday, 26 August 2022

SdKfz 166 Sturmpanzer Brummbär


This is, I believe, yet another Bergman 1:100 model that I've printed on my Mars Pro for my 15mm WWII wargames. It's the SdKfz 166 Sturmpanzer, called "Brummbär" by Americans who studied captured examples during the war, but apparently that name wasn't in use with the Germans themselves.

There are a variety of camouflage schemes it could be painted in, but I elected to go for overall dunkelgelb since I wanted to weather it fairly heavily, and it would be cluttered enough without also adding a disruptive pattern.


In this scale the model is about 60mm long by 25mm tall.

Tuesday, 23 August 2022

15mm Walled Garden


While I was organising my workroom today, I found some pieces of wall that I found somewhere (probably Thingiverse) and printed a very long time ago, and thought I should probably actually do something with them.

They were intended, I think, to be the surrounding walls for a cemetary, or maybe a walled garden. I've chosen to go with the walled garden enclosure, since a bunch of headstones would tend to get in the way of placing troops inside the walls.

I glued them together and put them on a piece of heavy card, with the edges chamfered down thin. I added some rubble and vegetation flock, slapped on some paint, and bing-bong-bosh, there's another piece of terrain for 15mm soldiers to hide behind on a wargames table.

I've included a 15mm PSC German 81mm mortar team, for scale.


Saturday, 20 August 2022

Old Stone Ruins


These is another terrain piece from Printable Scenery, cut into two pieces and printed on my Ender 3 at 0.2mm layer height in eSun PLA+. I printed it using Tom Tullis' terrain profile for Cura 5, but if I were to do it again I'd bump up the number of walls to three or four, as the columns proved to be quite fragile and broke off easily when I (repeatedly) dropped the pieces.

I began (after gluing everything back together again) by priming everything black, and then spraying a downwards zenithal white to define shadows and highlights. In retrospect, the zenithal spray could probably have been skipped, as the next painting step pretty much obliterated it.

I painted splotches of three colours all over everything: yellow ochre, burnt sienna, and Van Dyck brown, in roughly equal proportions. You can see the result in this photograph, and as I imagine you'd agree, at this stage it looks pretty awful. I used Maimeri gouache acrylics for this step, thinned down until they're quite liquid.


Once the spotty paint was dry, the next step was to over-wash everything with black.

This technique was originally developed for railway modellers' cliff faces and such-like, and it works better on plaster or similar absorbent material, as the paints and wash penetrate into the surface and the black wash evens out the tones a lot more. However, it still works on this unabsorbent plastic, if not quite as well.


Once the black wash has thoroughly dried, the next step is to dry-brush everything to knock back the darkness and bring out the edges to delineate the forms.

I used Vallejo VMC Buff for most of this, and then some VGC Elfric Flesh (a very pale off-white) to catch the upper edges.

After dry-brushing, I went over everything, stippling very thinned-down Elfric Flesh with a natural sea sponge, to give the weathered stone a bit of textural variation. Many areas got two or three layers of this treatment.

The terrain piece is usable just as it is, but a next step would be to add some moss and grass flocking in amongst the cracks of the paving and in various of the crevices.

Friday, 19 August 2022

Planescape 5e


It seems that WotC are re-releasing Planescape for D&D5e in 2023.

Planescape is one of those things that never really seemed to live up to its promise. I found the concept interesting, and I really enjoyed Tony diTerlizzi's art, but it didn't go as far into The Weirdness as I thought it should. I doubt that it will be any different this time around either, though 5e's nature as an over-the-top cinematic superhero game could suit it.

All of these D&D settings are, of course, heavily reliant on the DM for their realization, but I feel there's something missing from the Planescape milieu, and I don't know quite what that thing is.

Also, I absolutely hated the cutesy patois they scattered all through it.

Wednesday, 17 August 2022

Printable Scenery - Ruined Crypt


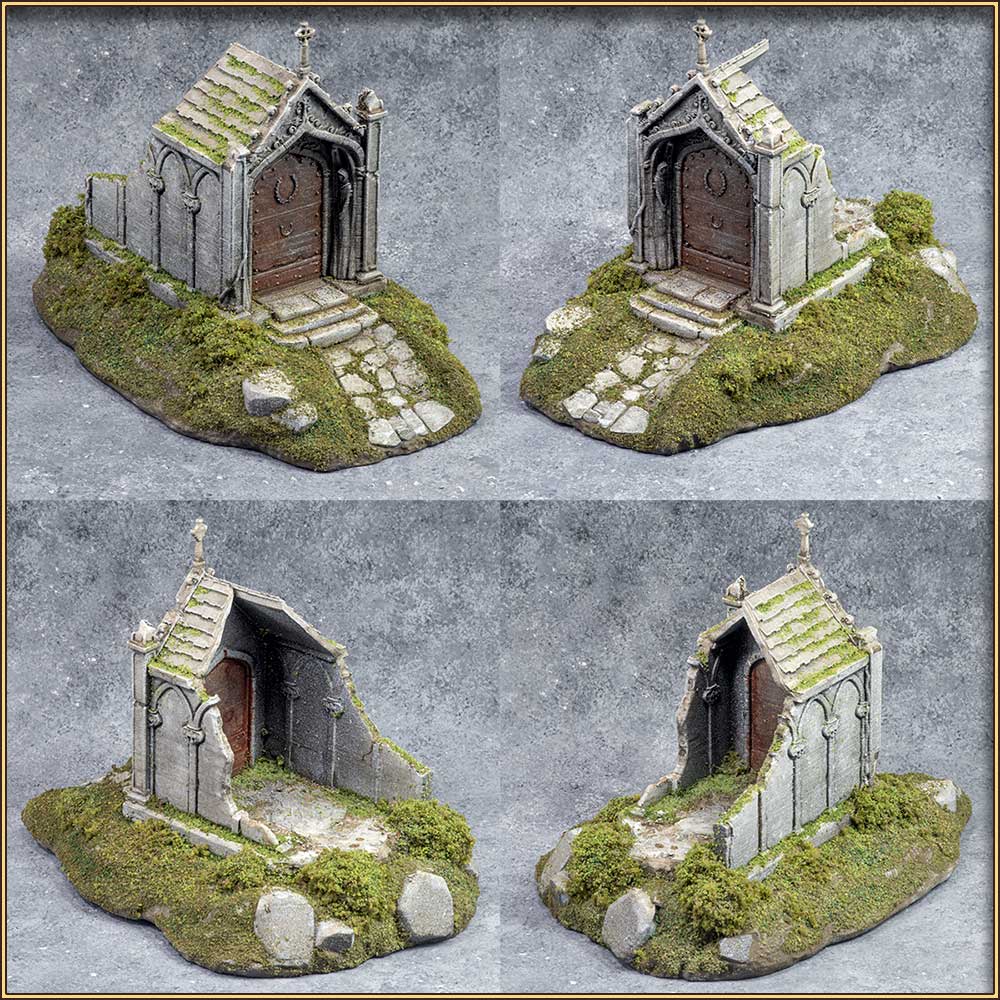
I bought and printed this model from Printable Scenery * some time ago, but have just got around to painting and flocking it.

It's scaled for use with 28mm miniatures, and printed on my Ender 3 at 0.2mm layer height in eSun PLA+.

* I can't find it on their website any more, but I expect it's there somewhere. Their catalogue is quite extensive these days.

** Ah, here it is: it's part of a set called Hallowed Mausoleums 


Saturday, 13 August 2022

Humber Scout Car


I watched A Bridge Too Far again recently, while I was banged up in Covid Jail, and it occurred to me that what I really really need is a little 15mm JOE Vandeleur in his little 15mm Humber scout car.

I found a 1:56 Humber on Thingiverse that I could assemble into a one-piece model and rescale, so now all I had to do was sculpt a teensy-tiny Michael Caine to perch on it.

Monday, 18 July 2022

Holder for Citadel Paint Pots


I don't use Citadel paints, except for their washes. Agrax Earthshade, Athonian Camoshade, and Nuln Oil are the main ones I favour, though I occasionally also use Seraphim Sepia (which isn't sepia at all).

The pots are easily knocked over, and the lids don't reliably stay open on their own.

I whipped this up in Blender, based on a design that I saw on the internet somewhere. It addresses both of those issues.

The broad splayed base keeps the pot stable, and the upright tab keeps the lid open. It's designed to take the larger pot size as well as the little 18ml ones, though I've heard a rumour that now that Citadel have reformulated their wash recipes, they might be discontinuing the larger (better value) size. I hope not.

The stand could do with a bit of refinement though — the upright is about 10mm taller than it needs to be, so that's just wasted printing time and filament.

Saturday, 18 June 2022

Desert War in 1:150 Scale


For no particular reason, except my customary inability to stick to a project, I thought I'd try printing some desert stuff in 1:150 scale (10mm) just to see how they'd turn out. The 1:100 Valentine in the background is a plastic PSC kit, for comparison.

The Valentines are one of M. Bergman's 1:100 models scaled down, and the infantry are 15mm Brits from someone whose name I don't recall, kitbashed in Blender to create a standing Bren team and then also scaled down to 66.6%

I'm not sure that this will go anywhere soon; if I want to go smaller scale than 15mm, I have a bajillion 1/300 scale models sitting around in drawers already. If I was starting out from scratch again, 1:150 or even 1:200 would definitely have an attraction, but I think I'm far too heavily invested in 15mm now, in terms of models and terrain, to start with a whole new scale.

I think they look pretty good though.

Tuesday, 31 May 2022

3d Printed Hedges


I got some STLs for hedges from https://www.wargaming3d.com/product/hedgerow-bocage-terrain-for-6mm-10mm/

They're presented as being for 6mm - 10mm gaming scales, and they're certainly best for those, but they're also quite usable for 15mm. In any larger scale though I think they'd just look like a herbaceous border planting.

These sorts of things are quite easy to make with some ice-block sticks and clump foliage, but the advantage (to me) of 3d printing is that I can just click-and-forget, come back the next morning and pull a bunch of hedgerows off the printer. Of course they need painting, so they're not entirely labour free, but painting them takes very little time or effort. Also, they're pretty well indestructible unless you jump up and down on them with hob-nailed boots. I can just toss them into a box without fear that they're going to lose any foliage.


Here they are alongside some 1/300 scale (5-6mm) Heroics & Ros Napoleonics, Spaniards in point of fact.

In this scale they're easily bocage-size. If you wanted smaller hedgerows, they're easily rescaled down in the slicer, and they'd print a lot faster too.


In 10mm (1/150 - 1/144 scale) they're also large enough to represent bocage.

Unfortunately I don't have any 10mm infantry. I printed this 1/150 Bishop as a test of one of Mr. Bergman's 1/200 scale models, just to see how it would look on the table, but I don't actually play in that scale. I would though, if I were starting out again from scratch.


In 15mm they're still head-high hedges, suitable for planting around pastures and what-not.

It would be a simple matter to rescale them a bit to create 15mm bocage, though unless you have a big printer the larger STLs would probably not fit on the print bed.

Tuesday, 24 May 2022

Cura 5.0 and FDG profiles


Ultimaker has recently released version 5.0 of its Cura FDM slicer, and Tom Tullis of Fat Dragon Games has, as usual, provided the 3d printing community with some excellent profiles for the Ender 3-ish printer family. They're available via his website, as usual.

Cura has an all-new slicing engine, and the improvements in its rendition of surface detail are marked.

This is one of Tom's own FDG miniatures, designed to be printed supportless. The print shows some striations and boogers; that's because I'm too lazy to be constantly tinkering with my machine to keep it in a state of ultimate tuning, and also it's getting a bit long in the tooth now. I'm not too concerned; at tabletop distances, those imperfections largely disappear under a coat of paint.

More importantly, observe the surface detail on the figure's helmet: the rivets and plates are defined much more crisply than I could have expected before with my stock 0.4mm nozzle. Likewise the chain over his groin, and the smooth upper curve of the plackart (the lower part of the breastplate).

This figure was intentionally designed not to be a challenge for the Ender series printers, which is why I chose it for this test. I wanted minimal complication so that I could see just what Cura's new engine could do. If I had thought ahead, I'd have also done a print using its old engine, but never mind, I've already uninstalled it. I'll just have to rely on my memory, and from what memory tells me, the new engine is a great improvement.

Thursday, 19 May 2022

Minitama

I made myself a miniature travelling Onitama set, this time on the 3d printer instead of out of wood.

The pieces are pegged, to go in the holes on the board, so there's no risk of them being shaken off.

The board is only 60mm on a side, and the whole lot could easily slip into a pocket, were it to be given a suitable box. Which it may very well be.

Tuesday, 17 May 2022

What's the point of the Cleric?


Really, what's the point of the Cleric as a separate character class? It's pretty much just another Magic-user with better hit-points and combat ability and no armour restrictions.

Even if the DM chooses to play a game in which sects and cults are socially important, there seems no point to me in the Cleric as a separate class. It would be more satisfying by far, in my opinion, to take care of all that religious palaver through roleplaying. If a player desperately wants a fighting spellcaster, there's always the multiclass/dual class Fighter-Magic-user option.

Saturday, 7 May 2022

Armchair Skeleton


This is a 28mm model from somebody's post-apocalyptic stuff, printed on my Ender 3 FDM machine, and it's a pretty good example of why I don't really bother much with printing miniatures on that machine any more.

I could tune it to get cleaner results (probably) but frankly I can't be bothered. Not when I can get much better results more easily on my resin printer.

Thursday, 7 April 2022

Figure Size and Model Scale

 This is a somewhat fraught subject, and there are people out there who take their own opinions very, very seriously. I suspect that they're very angry people at heart, and need to chill a bit, but anyway.

The main thing to remember is that the numbers used to describe miniature figure size and model scale are quite different, and bear only a passing relationship to each other. A purportedly 15mm figure might be anywhere from 12mm to 18mm or worse, but a 1/72 scale model will (or should) always be in a proportion of one real-world centimetre to 72 scale centimetres.


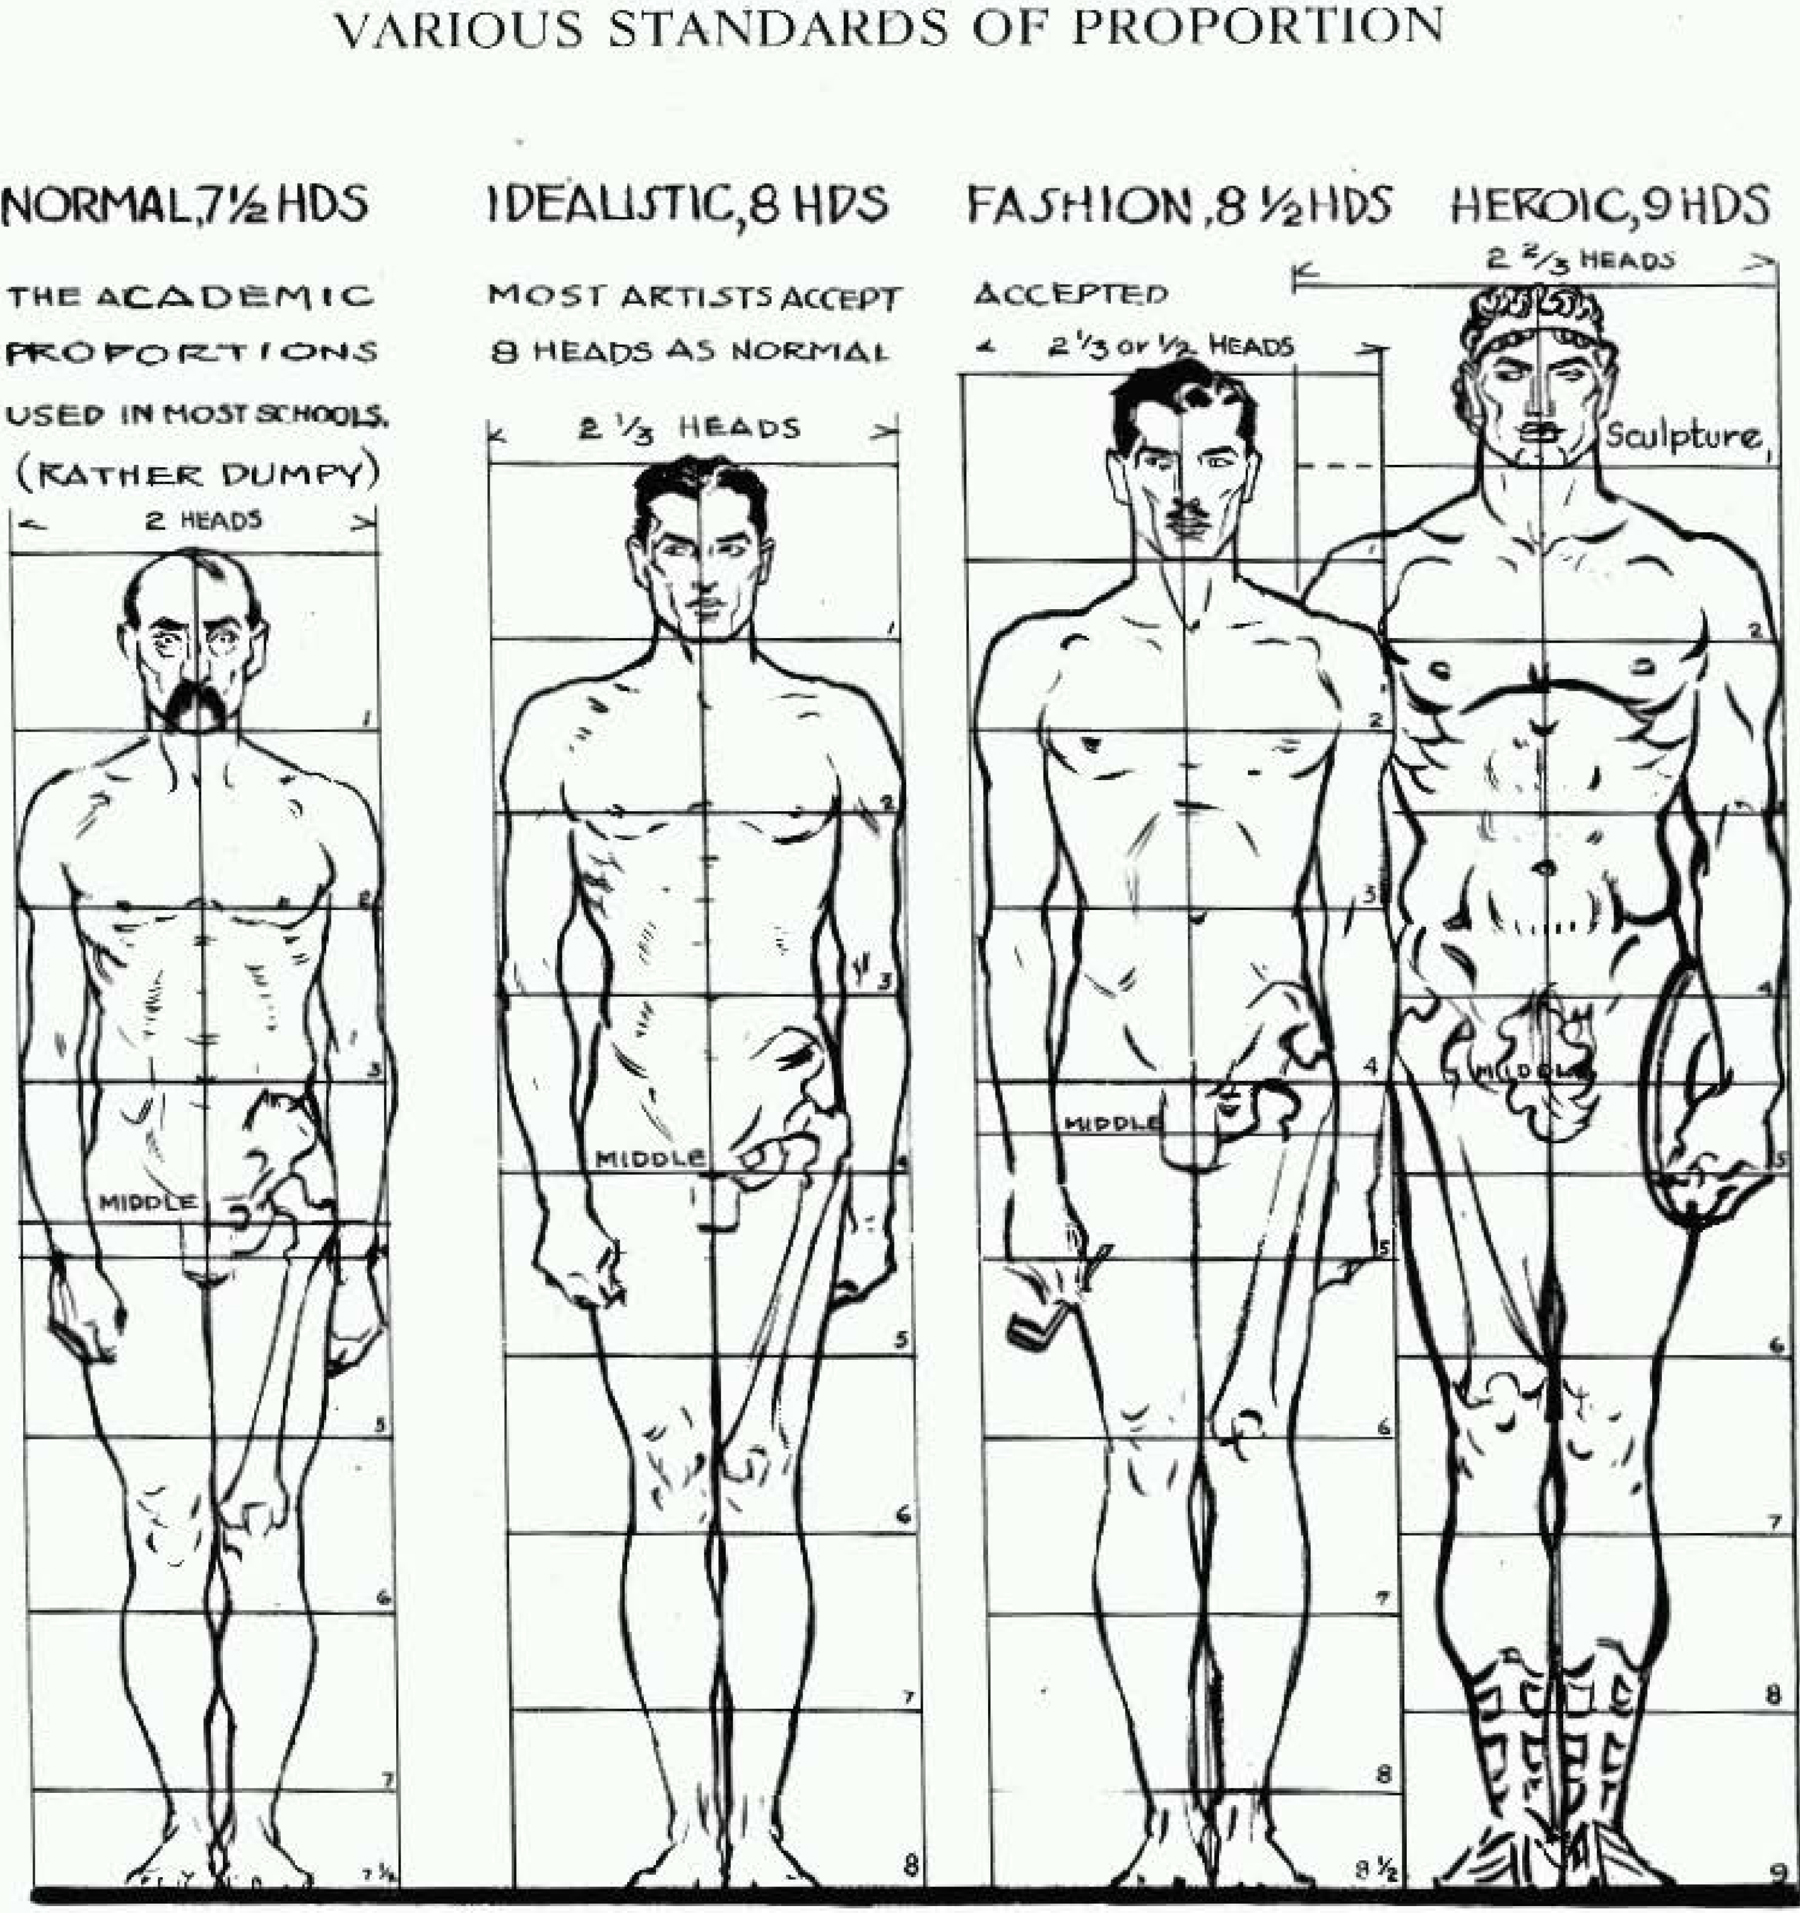
This image is from Andrew Loomis' famous work on figure drawing, Figure Drawing For All Its Worth.

It's a very influential work for illustrators, but its main purpose here is to give us some proportions to work with.

Loomis describes the normal male as being 7½ heads tall, which is a handy starting point as it's independent of any actual measurements. However, thanks to the magic of the internet, we can tie it to some real-world figures — it turns out that the global mean male height is 171cm (5'7⅓"). Therefore, the mean height of one head is 22.8cm, for what that's worth.

Miniature figure size is generally agreed to be measured from the soles of the feet to the eyes*, thus allowing us to ignore any tall fancy hats or the like. The eyes are half way up the head, which handily allows us to ignore the ½-head and declare that our mean male miniature figure's eye height will, in scale, be 159.6cm, which, for ease of calculation, we can safely round out to 160cm (5'3").

* Though remember those angry people who take themselves far too seriously. They may have other ideas.

Phew.

So anyway, now that we know all that we can work out which model scales and figure sizes should go together visually:

Model
Scale
Scale Figure
Eye-Height
(mm)
Standard
Miniature
Size
1:300 5.3 6mm
1:285 5.6 6mm
1:200 8 8mm
1:144 11.1 12mm
1:100 16 15mm
1:76 21 20mm
1:72 22 20mm
1:64 25 25mm
1:56 28.6 28mm
1:48 33.3 32mm
1:35 45.7 45mm
1:32 50 54mm
1:24 66.7 70mm
1:12 133.3 130mm

These are not, of course, hard and fast rules. There are many people, for example, who use 1:48 scale vehicles with their 28mm miniatures, just because they think they look better. And 25mm figures are often used with 1:72 scale vehicles, mainly (I think) out of tradition. More power to them; they're their models, and they can do with them as they please and it will harm me not one whit.

A Note on Figure Sculpting

The proportions given by Loomis may not be entirely suitable for figures sculpted for gaming use, especially in the smaller scales. Often, elements like heads and hands will need to be sculpted slightly larger than would be strictly accurate, and limbs may need to be thicker just to stand up to the rigours of handling.

There is some natural variation in the size of real human beings, and there's nothing wrong with reflecting this within a unit of little army-men. Different sculptors may create their figures at slightly different sizes than other sculptors, and mixing figure ranges can create some pleasing height variation.

BUT items of equipment like rifles, webbing, ammo boxes and so forth do NOT vary in this way, and if two figure ranges have visually differently sized rifles, for example, then when mixed together they will just look wrong and wonky.

Saturday, 2 April 2022

Hawker Hart (1:144)


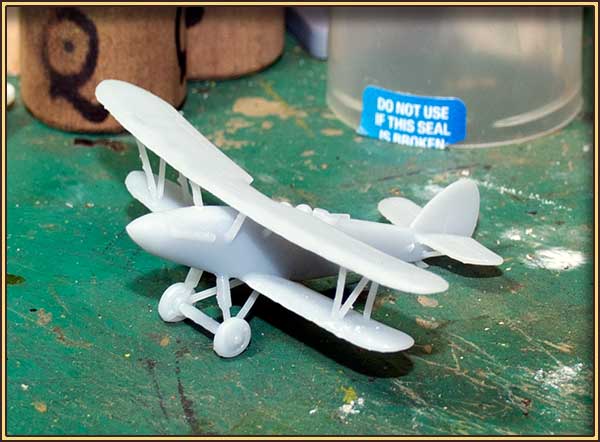
Some time ago I designed a 1:144 scale digital model of the Hawker Hart in Blender, and from time to time I have another go at 3d printing it.

The silver one on the left is printed in FDM on my Ender 3; the STL for that one is split longitudinally and the model is printed in two halves. The resulting print is okay, but as usual with FDM the surface texture is quite striated, I end up with a lot of little nubbins where supports rest, and the struts and undercarriage are really quite rough. It will do as a wargames model, but I crave something smoother.

However, I've had very little success when it comes to printing aircraft in resin, like the one on the right. This one was also cut in half, but fore and aft this time.

Part of the issue is that resin isn't all that dimensionally stable, and warping in the curing process is fairly common. But the recurring problem, again and again, is deformation of one or more wing-tips. Even when I've supported both sides completely symmetrically, I'll often get one side failing to print properly. In the case of this print, the profile of the whole port side is screwy, and I honestly have no idea why.

I'm trying another print right now with the front half of the plane in a different orientation, but to be honest I'm getting a bit pessimistic.


Next Day...

Success at last!

I had a couple of breakages when the supports came off (one of the wing struts, and the undercarriage) but they glued back together okay with some raw resin, cured with a UV flashlight.

There is a little bit of sanding to be done where support nubbins exist, but it's the best result so far.

I'll print one more, and paint one in the silver peace-time livery and the other in the dark earth/dark green it would have been repainted in if it had to go to war.

Thursday, 24 March 2022

You Are Here

 At last, a genuinely useful galactic map for space-operatic tabletop roleplaying purposes.


I don't know who originally made this wee masterpiece. If you know, I'd love to be able to give credit where it belongs, so let me know.

NOTE: Sectorbob, in the comments, tells me "That was made by VENGER SATANIS for his Alpha Blue setting/rpg. Mostly a silly fun rpg with a lot of slease." I've  heard of Alpha Blue, but never seen anything of it in real life.

Tuesday, 22 March 2022

Saving Throws

 I don't know the exact history of the saving throw mechanic across the various editions of D&D and its ilk. I do know that it has changed considerably in detail, but not in essence — regardless of the specific implementation, it gives the player a chance to avoid or ameliorate some sort of effect, be it damaging or not.


AD&D has a fairly byzantine system, in which saving throws are split into categories depending on the effect. Some effects, however, fall into two or more of those categories, and as far as I'm aware it has never been unambiguously stated how those categories were originally conceived. The Rod Staff or Wand category, for example, would seem to embrace the agility needed to avoid the magical rays cast from them, but the trouble is that the effects created by rods, staffs, and wands are by no means limited to dodgeable rays.

The categories, in order, are

  1. Paralyzation, Poison, or Death Magic
  2. Rod, Staff, or Wand
  3. Petrification or Polymorph
  4. Breath Weapon
  5. Spell

I've read opinions that this is supposed to be read as a hierarchy of effects, but the arguments are not compelling.

Like the concept of hit-points, AD&D saving throws are pretty abstract. The exact way they work isn't really spelled out, and is left largely to the imagination.


D&D3e introduced a three category saving throw system:

  1. Fortitude
  2. Reflex
  3. Will

They were based on the character's abilities: CON, DEX and WIS respectively, and instead of basing the saving throw on a class of effects, the important thing is to decide how the attack would affect the character and assign a save category accordingly.

The character's level is still the most important influence on the likelihood of making or failing a save, but now (some of) their characteristic totals also become relevant.

One side-effect of the change to this system is that saving throws become a bit less abstract, and there's no implicit mechanism to reflect pure luck. How does a warrior, pinned spreadeagled to a rock wall, save vs. the breath of the dragon who is about to incinerate them? None of the characteristic-based saving throw categories would really apply without an unconscionable amount of hand-waving.


I know little of D&D4e, and what I did see of it I hated. let us pass it by.


D&D5e ties saving throws even more closely to the character's ability scores, and now they're implicitly a STR save, or a CON save, or an INT save, or whatever. On the face of it, it's a simple, logical system, and for the most part it works fine. Just like D&D3e, the effect on the character and the nature of the attack are the most relevant things, and just because an attack comes from a wand, there's nothing specifically wand-ish to be considered when determining which characteristic to save against.

D&D5e reduces the abstraction of the saving throw mechanic even further than D&D3e, and again, there's no specific method of reflecting a save based purely on luck.


The saving throw mechanic used by the Swords & Wizardry retroclone simplifies matters considerably. Each character class has a single Saving Throw target number. There's no worrying about the nature of the effect, or the character's abilities, or any of that. A saving throw is just a saving throw; it'll always be the same at any given level regardless of how or why a save is required.

Fighters have the worst saves (though not by much). Wizards are better. Thieves have the best saves (though not by much). As with other variants of D&D, the saving throw target number gets lower as the character rises in level, but there's just the one target number at any given level.

Having a single save is also advantageous if one wants to go the characteristic save route, as used in D&D5e, since you can just add (or subtract) any ability modifier to (or from) the target number, and Bob's your uncle. In S&W that's unlikely to make much of a difference; as it's a 0D&D retroclone, ability modifiers tend to be small.

This is the most highly abstracted, and in my view the most elegant, saving throw system within the extended D&D fold, and I like it very much. It performs the basic function of the saving throw (allowing the character to escape some or all of an effect) but it is not tied to anything but the character's level. Want to avoid some falling damage? Make a saving throw. Being attacked by an acid-spitting dong-worm? Make a saving throw. Want to remember something your character knows but you can't recall? Just make a saving throw. Easy-peasy. How did the save work? I dunno, make it up. These games are supposed to be games of imagination.


Sunday, 20 March 2022

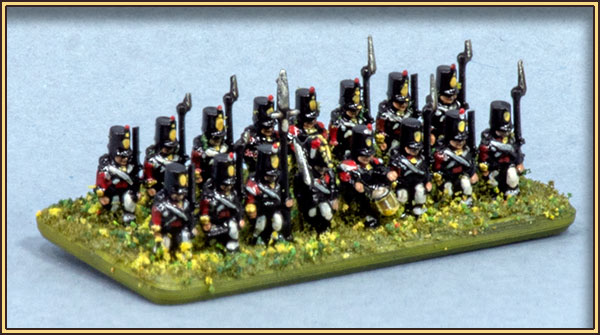
6mm Napoleonic Brits (3d printed)


I've printed some of Henry Turner's 6-15mm Napoleonic British sculpts at 6mm on my Mars Pro, and made some 40mm two-rank sabot bases for them on my Ender 3. I like his proportions for 6mm, but I find them just a tad too chunky and dwarfish for 15mm.

At the moment only the front rank strips are glued in place; they'll be painted along with the base, while the rear rank strips will be painted separately and then be glued in place. The battalion colours will also be painted separately, and then be glued in place — the colour bearers' hands can be drilled out to accept a pin, and the colours themselves will be made of paper.

There have been a few casualties amongst the muskets and bayonets when I removed the printing supports, but never mind.


These five bases would make a full medium-sized battalion for Black Powder in 6mm. The left and right bases are half-and-half line troops, with the woolen puff epaulettes, and flank troops with the swallows-nest epaulettes. The difference is visible if you look really closely, but in this scale I think differentiating them in this way is largely pointless. Nevertheless, I've got them, so I might as well use them.

I've photographed them here with some Heroics & Ros 6mm Spaniards, on 3mm MDF bases, for comparison. They are more detailed than the H&R metals, but how much of that extra detail will be visible on the wargames table is yet to be seen. I guess it will depend a lot on the quality of one's eyesight, and mine is pretty crap these days.


Couple of days later...

This is the first test base, painted and flocked. The 3d printed sabot base seems to have worked as planned; the ranks aren't perched up on little mounds as they would be if they were glued straight to a flat surface.

The figures are just block-painted over a black primer, and then sploshed with Army Painter Dark Tone which does successfully delineate a bit of the detail present in the prints — detail that will be only minimally visible at tabletop distances. It's not a painting standard that will reward close scrutiny, but they'll look okay en masse on the table.

These two strips suffered even more than most when I took the supports off, but hopefully the flags will distract from the missing bayonets.

There are a pair of colours still to go on this base; I'm waiting on some toner for my printer for those. Normally I'll print them to get some precision in the outlines, mount them on their pins, and then give the paper a bit of flowing contour and finish by painting in some shadow and highlights.