Friday, 26 July 2019

Vickers Light Tank Mk.V (2 pdr)

In the latter half of the 1930s, experiments were made with mounting a 2 pounder anti-tank gun in an open-topped box turret on a Vickers Light Tank Mk.V, to create what would later be known as a tank destroyer.

It would have had the advantages of being relatively cheap, small and easily concealable, and quite fast for its time, and the 2 pounder was arguably the best ATG in existence then. However, it would have been very vulnerable to return fire from virtually anything heavier than a machine-gun.

It was not taken up by the British army, and never went into production. However, that’s no reason not to have a model of it, if only for “what if?” scenarios.

The model comes in separate STLs for three components: the turret and turret plug, and the hull. You can get it at https://www.wargaming3d.com/product/vickers-light-tank-mk-v-2-pdr/

If you don't have access to a 3d printer, you can get the model printed for you by Shapeways at http://shpws.me/Rn3m


The figure is a WW1 British officer from Peter Pig.


Tuesday, 23 July 2019

T-24 Revisited

I've redesigned my model of the Soviet T-24 of 1932 for home printing, and uploaded the STLs to Wargaming3d
It's a 1:100 scale (15mm) model. It would up-scale to 1/72 OK, but any larger than that and you'd probably want to replace all the guns with something a little more delicate.
The photos shown here are SLS prints. FDM, or especially DLP would, of course, be better, but the SLS print looks quite OK as a wargaming model, and it has the advantage of being nigh-invulnerable. SPOOOON!!!

Component STLs

SLS print from Shapeways

SLS print from Shapeways

SLS print from Shapeways


Note: I've now added optional pieces so that people can, if they so desire, print the hull and tracks as separate components. I know some people like that.

Sunday, 21 July 2019

Hobgoblin Archer

It has been quite a while since I've painted any fantasy figures, but this is one.

I believe it's a Citadel figure, and if I recall correctly it's one of a three-pack of hobgoblins. It's quite old; it's been hanging around my painting bench for years and years and years just based and primed.

Well, now it's done. Whether it will ever see any use in a game, only time will tell.

Saturday, 20 July 2019

Bison

In the background, an Austin 10 staff car. The figure is from Battlefront.
The Bison was a class of improvised armoured lorry, created by the simple expedient of encasing the cab and engine bay in a thick shell of concrete, and putting a concrete bunker on the back. All sorts of trucks were used as the basis for these ungainly machines, and there was no particular standardization about them at all.

I was intending to make myself a model of a Bison, but then I found that a chap going by the name of DeweyCat had already made one in 28mm for free, so that saved me a bit of work. I just had to re-scale it to 1:100 and print it.

For once the visible printing layer lines are actually advantageous, as they look like cast concrete. Bonus!

Friday, 19 July 2019

King Worm Mk.III

 I was doodling idly in Blender, and I decided to give my King Worm some legs to go with his arms.

The model is about 120mm long. The STL is at https://www.thingiverse.com/thing:3755934


Wednesday, 17 July 2019

Medium C "Hornet"


The Medium C, nicknamed "Hornet", was designed towards the end of WW1, intended as a replacement for the Medium A "Whippet". It was much superior in every respect to the Whippet, but it was too late to see action in WW1. It remained in British army service until the mid-1920s.

I've made this model available before on Shapeways, but now it's available as a STL for home printing from my shop on Wargaming3d at https://www.wargaming3d.com/product/medium-c-hornet/

The model shown here has been printed horizontally, sitting on its tracks, in eSun PLA+ at a layer height of 0.08mm. It is 1:100 scale for 15mm gaming, but it can easily be scaled up or down in your slicer for other scales.


Sunday, 14 July 2019

Brute Squad Base

 I designed and printed a 90mm x 60mm sabot base for my 15mm Brute Squad (they're actually 10mm Warmaster ogres I got on sale from a cheap bin).

The figures are based on 16mm (5/8") washers and the sockets are sized to accommodate those, and the base includes square cavities for two 5mm or 6mm dice at the back to keep track of casualties or morale or whatever. These are intended for my fantasy variant of Hail Caesar.

The STL is available free for download from Thingiverse at https://www.thingiverse.com/thing:3744480


See the dice?

Painted, flocked and finished.


Here it is with the Brute Squad in place. I epoxied some stones on either side, to make it easier to pick up and move around, and a few more scattered about just for the look of the thing.

The figures stay in place reasonably well as long as you don't fling the base about, but I've put a little blob of BluTak under each one, which holds them quite firmly in place while still allowing them to be removed and replaced at will.

Thursday, 11 July 2019

Bishop

The Bishop was a British attempt at a self-propelled gun, mounting the excellent 25 pounder gun-howitzer on the chassis of a Valentine tank in a big steel box. It was not entirely successful; the gun couldn't reach its full elevation, so range was impaired, and the very high silhouette made it very difficult to conceal in the desert. Very little ready ammunition could be stored in the vehicle itself, so it towed an artillery limber for its immediate use.

This is one of Bergman's 1:100 scale (15mm) models which I printed some time ago, but have just now got around to painting.

It's not likely that I'll actually use the limber on the wargames table; there's no benefit to it under the Battlegroup rules, and it would necessitate basing the whole shebang, which I prefer not to do with vehicles.

A15 Crusader in 15mm

I've uploaded some STLs for WWII British cruiser tanks for the desert war in North Africa to Wargaming3d


The Crusader II, with and without the MG sub-turret
https://www.wargaming3d.com/product/a15-crusader-ii/


... and the Crusader III


The models have been created at 1:100 scale for 15mm gaming, but I think they should scale up easily enough. Scaling down might be more problematic, as the 2pdr gun is a very slender item already. For 1:150 or smaller, I would probably just replace it with a short length of wire.

Test Prints and Things


The Crusader II test print was printed horizontally, with the tracks and the base of the turret right on the print-bed. As expected, the very gently sloping upper panels all show a lot of layer lines, but a bit of scraping and judicious painting will minimize those. At tabletop distances, I very much doubt they'd be noticeable in any case.

The Crusader III I split up, fore and aft, both the hull and turret, to print vertically.

This certainly ameliorates the issues with layer lines on the upper panels, though there is a bit of post-print assembly necessary.

The only real issue with this method is that the 6 pounder gun barrel, when printed vertically, was very fragile indeed, and it broke off almost immediately. I replaced it with a new one made from a length of bronze brazing rod. I've done this a lot with metal/resin models, so it's no big deal.

I've since modified the split-turret STL to remove the gun entirely, and to replace it with a socket. That should make adding a metal gun barrel a very simple matter in future.

Saturday, 6 July 2019

British WWII Desert Colours

Left: a Bishop 25 pdr SPG in 71-143 Light Stone
Right: an A9 Cruiser Mk.I in 71-288 Portland Stone
Vallejo have introduced a couple of colours to their ModelAir range that I will find very useful for my early WWII British desert stuff:

  • 71-288 BSC 64 Portland Stone — the basic arid-country colour for pre-war and very early war vehicles, and the background colour for the "Caunter" scheme, and
  • 71-143 UK Light Stone — a darker shade, but similar in hue, that chronologically overlapped with and then replaced Portland Stone.

Up until now I've been using 71-075 Sand (Ivory) as a stand-in for Portland Stone, but as you can see in the swatches below, it's a much more creamy-yellow colour. 71-288 looks a lot more like how I remember the ancient and venerable Humbrol 8th Army Desert Yellow that I used to use in my far-off youth.

I have no idea how long these colours have been available from Vallejo, but I only just found them. I haven't found any explicitly Silver Grey or Slate Grey colours, so I'll just have to carry on using my equivalents for painting Caunter.

Tuesday, 2 July 2019

The Bigger They Are....

Huge, but silly
 I've uploaded my 1:100 scale (15mm) model of the monstrous, but somewhat ridiculous Char 2C to my shop on Wargaming3d.

When they went into production, these things were the biggest, heaviest, and on paper at least, the most powerful tanks in the world. About a dozen were eventually built, and they were sent into action against the Germans in 1940, but none of them actually made it into battle.


Does my bum look big from this angle?

Wednesday, 26 June 2019

Brand New for 1926, the A1E1 Independent from Vickers!


I'm building my 15mm A1E1 Independent (a British experimental tank from the 1920s-30s). I'm quite fond of these old rivet-studded land dreadnaughts.

The STL is available at https://www.wargaming3d.com/product/a1e1-independent-15mm/

================

I printed the turrets and hull separately, as I wanted to use line supports and a support roof for the turrets, and tree supports for the hull.

The hull has been split into two pieces, fore and aft, and printed vertically. I find this tends to give me the cleanest detail in the running gear, and on sloping panels which would have very pronounced layer lines if printed horizontally.


Here the two parts of the hull have been cleaned up (I'm getting a fair amount of stringing at the moment.)

The turret has had a magnet glued into the base of its turret plug, and a nail head is glued into the bottom of the socket. This allows the turret to rotate freely, but it won't just fall out if I turn the model over.

The MG sub-turrets will just be glued in place; it's not really important for game purposes that they be able to rotate.

I'm keeping some of the tree supports (to the right of the photo) and I'll turn them into dungeon terrain pieces.

====================


Assembled and primed, now all that's needed is the final paint job.

I replaced the exhaust pipes with lengths of wire, as I broke one of them off when cleaning up the print. The down-side to printing the hull vertically is that elements like these, which would be quite strong if laid down horizontally, become a bit fragile.

=====================

Frontish
I've used Vallejo ModelAir 70013 Yellow Olive to represent the British peacetime military Deep Bronze Green.

I've tried it before and not been that happy with it, but I realised that's because I sprayed a matte-coat over the top. The peacetime vehicles were always finished in a satin or high gloss finish, for smartness rather than concealment, so I've given this one a satin finish as well. It makes a much better Deep Bronze Green this way.

It's been given a very light dry-brushing with a much lighter yellow green of my own recipe, and it's been pin-washed with Nuln Oil. There are no markings (as yet); the original vehicle has none except for serial numbers and the like. 

Rearish

Toppish

Saturday, 22 June 2019

Record Keeping

 I have never been good at keeping track of process notes. It was a requirement at art school, and I did it fairly well there, but then I got out of the habit again. It's something that I've seen recommended again and again, but for one reason or another (mainly laziness, if I'm being honest) I just haven't done it.

Now I'm making a conscious effort to be more organised in that respect, so that I don't have to reinvent the wheel every time I do something. My memory isn't terrible, but neither is it perfect, and having the specifics of a project written down is always handy if there's any chance at all that I might want to repeat it some time in the future.

I've used a wire-bound A5 sketchbook with decent heavyish cartridge paper pages that will take paint and glue without too much show-through. I really don't like wire-binding, but it does have the advantage that the book stays flat when it's open, and if I need to get rid of a page I can just tear it out without affecting the rest of the binding. The A5 size is convenient; the pages are large enough to fit a decent amount of information, but the book doesn't take up too much room when it's open for reference.


Saturday, 15 June 2019

3d Printing All Over The Show

Now that my printer's back in action, I've been expanding my 15mm WWII catalogue a bit, though without any particular care about a consistent theme.

In the foreground, and up on the wooden block, are a pair of German sIG-33 150mm infantry guns. The grey vehicles are Italian Autoblinda AB-41 armoured cars, and on a painting stand at the back is a spare turret to turn one of them into an AB-40. And the khaki-green thing on the other painting stand is another Bren carrier.

The quality I've been getting from the printer has dropped off a bit, and I need to do a bit of maintenance on it. I'll put on a new nozzle for a start, and check the Bowden tube — that may need renewing too. If they don't take care of the issue, perhaps a spacer on the extruder spring might be in order, but first things first.

Thursday, 13 June 2019

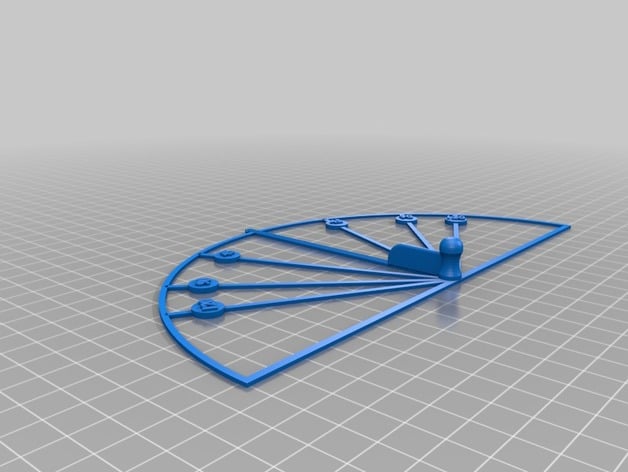
Firing Arc Protractor

This might be of use to somebody, if you have access to a 3d printer: it's a simple protractor for determining if a target is within your firing arc.

Tuesday, 11 June 2019

BEF Bren Carrier

Here's a 3d-printed 15mm (1:100) Bren Carrier. This is one of the predecessors to the Universal Carrier, which removed the need for several dedicated vehicles for specific roles.

The original model was designed by M. Bergman; I've added rivet and track detail, and a couple of reasonably detailed crewmen. It's an acceptable print in FDM for a wargaming model, but it would be a lot better if printed in resin on a DLP or SLA printer. I don't have access to one of those, so what I've got is what I've got.

I'll probably print a couple more at some stage, because why not, but I actually already have enough metal Universal Carriers to equip a full battalion, so they're not really strictly necessary for my wargaming needs.

Thursday, 6 June 2019

New Zealand Pattern Wheeled Carrier

This was a New Zealand assembled version of the Indian pattern carrier. It differed from the original Indian vehicle by being welded rather than riveted, and it had larger wheels. It shared with its progenitor the flaws of being under-powered, and having quite poor off-road performance, and the New Zealand carrier didn't see overseas service at all until the Korean War, when it was employed as an artillery observation vehicle.

The Indian pattern, on the other hand, saw service in North Africa and in the Far East, and I have painted this one up as one of those in the desert theatre, in a camouflage pattern from about 1942-43.

The model is a 1:100 scale (15mm) 3d print, designed by M. Bergman and printed by me on my Ender 3.

Tuesday, 4 June 2019

Flak 36

Since my 3d printer crapped out, I've been painting some of the stuff I'd already printed and then put aside, in this case because it's really not a very good print.

The crew are 15mm German artillerymen from Peter Pig, and they too aren't the best. Peter Pig produce a wide array of figures, but their faces do all look like they've come straight out of Munch's The Scream, and in this case, they would be better suited to a smaller, lower gun than the 88. However, they're what I've got, so they're what I've used.

The base is 3mm MDF with a variety of home-made sawdust and foam flocks.