Tuesday 31 December 2019

Ram Kangaroo

This Marco Bergman's 1:100 scale Ram Kangaroo APC, printed on my Ender 3, and painted up for the early part of the Italian campaign. I added some detail to the track edges, but I neglected to add any track guides before charging ahead and printing it.

The paint I used for the Light Mud camouflage colour came out much brighter and yellower in the photo than in real life, though even in real life it should probably be a bit darker and duller. Hey ho. In truth, I'm not sure that any Kangaroos would have been painted in disruptive camo, but they might have.
Note: Now that I've done the very basic research I should have done before, it turns out that the Ram Kangaroo didn't come into service until quite late in 1944, so it should really just be in plain SCC 15 Olive Drab.

Thursday 26 December 2019

A Glitch in the Matrix

Challenger 17pdr tank (M.Bergman)
As I noted in earlier posts, I've started getting layer shifting in my Y axis.

I'm looking at various things to try to diagnose the fault. There doesn't seem to be anything physically obstructing the print head travel, and all the belts and pulleys seem to be clear. Everything moves cleanly under finger pressure.

My current hypothesis is that it's degradation of the SD card I use to print from, since all the models showing this behaviour have been printed from one particular card and a test cube I printed from another didn't suffer from it. I've reformatted the card, and I'm doing a test print from it right now, so in a couple of hours I'll see if that has had any effect. If not, I'll try printing the same file from a new card.


Wednesday 25 December 2019

Ram Badger

The Badger was a variant of the Canadian Ram tank. The turret was removed and the turret ring plated over, a small machine-gun turret emplaced there, and the bow machine-gun replaced with the same flamethrower as was mounted on the Wasp.

It was intended as a more heavily armoured replacement for the Universal Carrier-based Wasp flamethrower, which had proven to be dangerously vulnerable on the battlefield, being open-topped and impervious to nothing larger than small arms fire.

The Badger was on strength with the Canadians from 1944, but didn't see active service until 1945.

This is a 1:100 (15mm) 3d printed model, designed by M. Bergman and printed by me on my Ender 3. I've added a bit of extra detail to the tracks.

Tuesday 24 December 2019

More Adventures in 3d Printing

I printed this 1:100 Ram Kangaroo last night. It's a Bergman model; I've just added some detail to the edges of the tracks. Overall, I'm not displeased with it.

However.

If you look at the transmission housing at the front of the hull, you will observe a nasty seam. That's a slight layer shift. There are a variety of reasons why this occurs; because this is a one-off shift, it was probably something catching on one of the parts of the printer as the print head was moving, quite likely some filament detritus getting caught in the belt and pulley, or something like that.

I thought the issue was in the X axis, because that's the direction of th shift, so I just spent about twenty minutes checking and cleaning all those components, and satisfied myself that everything is moving freely. Then I started another print of the model.

Now I know that the shift actually happened in the Y axis, because my memory is complete shit, and the model is actually printing 90° to what I had thought it was.

Hopefully it'll be fine. Hopefully.

Wednesday 18 December 2019

Gun Barrels

 The most problematic part of any military model, whether it be 3d printed as here, or moulded and cast traditionally in white metal or resin, is almost always the gun barrel. The limitations of materials and processes mean that they're almost always over-scale, and also often quite fragile. White metal is soft and tends to bend at the slightest pressure, while resin or 3d printing plastics are easily warped or broken.

One way around the problem is to replace those gun barrels with new ones made of something a bit sturdier. In the case of the AEC armoured car shown here, the QF 75mm gun was turned down from a steel nail, while the Crusader's 6 pounder was turned from a length of 2mm brass rod. The brass is, of course, a lot easier to turn than the steel, and is generally quite strong enough for gaming purposes; the only reasons I did the 75mm in steel were

  1. I wanted to see if it was practicable with the equipment I have to hand, and
  2. I didn't have the brass rod yesterday.


What I use for this sort of work is a cheap little mini-lathe I bought from BangGood, an online mega-store. It cost me about thirty bucks, so not a lot.

It's really little more than a drill chuck mounted on a little electric motor on an extruded aluminium bed. It's the sort of thing that would be trivial to put together oneself, if one had any electrical engineering skills at all, which I do not. It's not nearly as precise as a proper micro-lathe, as would be used by watchmakers and the like, but it's adequate for this sort of task.

I just use needle files for the shaping. They work fine, and the brass 6 pounder barrel only took five or ten minutes from start to finish. The steel 75mm took a bit longer, because the material is so much harder than brass.

I don't think it would be up to the task of turning very small barrels, such as for 1/285 Tigers, or 1/100 20mm flak, but it's fine for most 15mm jobs, and it's a lot better than my old setup, which was just an electric drill strapped down to a piece of wood.

Sunday 15 December 2019

AEC Armoured Car(s)

This is what I've been working on for the last few days — a British WWII AEC armoured car, with turrets for the Mk.III (75mm, on the body of the vehicle) and Mk.II (6 pounder, off to the left).

I also want to do a Mk.I, which will require a slight redesign of the hull front, and a Valentine or Crusader turret, both of which I already have from older models.
The STLs for the AEC Mk.I are now available for download from https://www.wargaming3d.com/product/aec-armoured-car-mk-i/ — the Mk.II and Mk.III soon to follow.

This thing was actually designated a "wheeled tank" when it went into production, rather than as an armoured car. It was the Brit's first attempt at a wheeled vehicle with the same armament and protection as their tanks of the time.


A bit later...

The modifications to the hull to create the Mk.I were a bit more involved than I had expected, which is about par for the course when it comes to any model I expect to be straightforward.

However, it's done now, and all I have to do is create STLs of the various components.


Note: it seems, from the bit of reading I've done, that there's a reasonable chance that the reports of the Mk.I being given a Crusader turret might be a case of  mis-identification or mis-translation in the foreign-language literature, and possibly the "transitional" vehicles might actually have been given 6 pounder Churchill turrets. However, the Crusader turret was certainly used elsewhere on armoured cars (on the Staghound, for example), so there's a possibility they were used here too. I'll provide a Crusader turret and let the user make the decision for themselves.

Later still...


I've got the first test prints done, and they're mostly OK. I will have to beef up the mudguards a bit though, as they're the main point of failure.

These ones have been printed on their wheels, but I'll also provide versions with separate wheels for the people who like that sort of thing.

Saturday 14 December 2019

Girder Bridge Trusses

This is a pair of girder trusses, approx. 190x19mm, intended for use on a temporary bridging structure for 15mm WWII wargaming.

They print flat on the platen, so they are detailed on only one side. If two-sided trusses are desired, they could be glued together back-to-back, but of course two sets would need to be printed.

They're available for free download at https://www.thingiverse.com/thing:4047326

Thursday 12 December 2019

Beaverette Mk.II

The Beaverette was an improvised armoured car created almost overnight in 1940 by mounting an armoured shell on to the chassis of a Standard touring car. This is the Mk.II version, which was improved in many respects from the Mk.I. It was usually armed with a single Bren gun, through firing slits at front and rear.

The Beaverette was widely used for training and by the Home Guard in the UK, and this and later turreted variants were also used for airfield defence both at home and abroad. One later model mounted the complete gun turret from the Bolton-Paul Defiant, and was used in an AA role.

Considering the panicked haste in which it was originally produced, it was surprising efficient, but nevertheless it would not have been up to the rigours of front-line service and it was never used in that role.

This 1:100 scale (15mm) model was designed by M.Bergman and slightly modified by me — I chopped the wheels off for separate printing, and replaced the very basic driver mannequin with a figure of my own design.

Wednesday 11 December 2019

WWII German Driver


I've been farting about in Blender, making myself a 15mm German driver that I can insert into trucks, half-tracks and the like.

It's a somewhat modified version of my old British driver, and as such, it's not a very flexible model — it's not rigged or anything. That will make further modification tricky, for turning him into a passenger figure for example. Plus, he doesn't have any feet. Poor bastard.

I'm intending it to be inserted into an STL before slicing, rather than to be printed as a standalone figure for gluing into an existing model. I suppose that would be possible, but it would probably need a bit of hacking about to make it fit most models, whereas if I add it digitally it can just be merged with the surrounding geometry.

Meh. Not great, could be worse.


I can get a barely adequate print of these little guys off my Ender 3, but this sort of thing really needs a high-definition resin printer.

I made another one without a steering wheel, for use as a front-seat passenger.

Tuesday 10 December 2019

PzJg 1 (75mm)

The PanzerJager 1  appeared very early in WWII, extending the useful lifetime of the Panzer 1, and it originally mounted a Czech 47mm gun which was quite adequate for 1940. However, combat reports on the vehicles' performance from Russia were not universally glowing, and it was soon superseded by other tank hunters mounting the KwK 75mm on Panzer 2 or Panzer 38t chassis, the Marder series.

This photo was taken in Berlin in 1945, and shows how desperate the Germans were at that time to mount anti-tank guns on just about anything they could find.

The Panzer 1 chassis was already overloaded with the much smaller 47mm gun and superstructure; you can see clearly how very front-heavy it was with a 75mm instead.

I know nothing at all about this vehicle except its existence. I doubt very much that its performance was stellar, but needs must, as they say.

The model came from TigerAce1945's Panzer 1 Pack on Thingiverse, and was printed on my Ender 3 in eSun PLA. The scale is 1:100, for 15mm gaming.

Saturday 7 December 2019

Churchill 3" Gun Carrier

 This is a 1:100 (15mm) model of the Churchill 3" Gun Carrier, designed by M. Bergman and 3d-printed by me on my Ender 3. The filament is eSun PLA (grey), and the layer height is 0.06mm.

It's not a vehicle that ever made it into active service, since its function was overtaken by better, more effective options even before its own development process was completed. There were about 50 of them built, nevertheless.


Thursday 5 December 2019

Flammpanzer 1

The Flammpanzer 1 was a simple field conversion of a Panzer 1A, replacing one of the turret machine-guns with an infantry flamethrower. It was originally used in the Spanish Civil War, and later at Tobruk.

This is a 3d-printed model, designed by Zac Kuvalich and printed by me on my Ender 3.

Tuesday 3 December 2019

A Droid of Some Sort

This is a 3d printed R1 droid, or at least, so it said on Thingiverse, where I got the file from. What an R1 droid specialises in, I have no idea, since although I'm happy to use Star Wars, I have no idea how it works.

It's shown alongside a space trooper from Reaper that I got in one or other of their Bones Kickstarters.

We seldom play sci-fi or space opera games any more, which is a shame, because I quite enjoy it when we do. I might have to run a game myself, maybe using a simple system that I can make stuff up in on the fly, like FUDGE.
Later: I forgot about RISUS. I found it years and years ago, an meant to do something with it, but never did. It's very, very simple, and the ideal thing for off-the-cuff games.

PSC 15mm Early War Germans

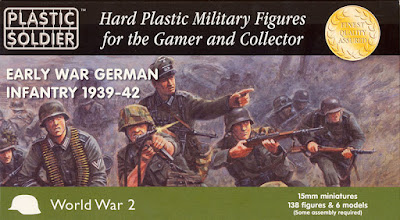
These just arrived for me today, a box of PSC's 15mm plastic German infantry for the first half of WWII.

On the box it says "138 figures and 6 models" — I'm not sure to what they refer when they say "models", unless maybe it's the 50mm mortar and anti-tank rifle teams which need to be assembled.

At about 22 quid (roughly forty KiwiBucks at the current rate of exchange) for in the region of 150 figures, they're not bad value. They're a lot cheaper than any metal alternative, as well as being substantially cheaper than Battlefront's plastic offerings in the same scale.

There are twelve sprues in the box, three with command and support personnel, and nine sprues of your regular grunts.

On each of the "grunt" sprues, you get eight riflemen in various poses armed with the Kar98, and two MG34 teams (gunner and loader), one standing, one prone.

The figures are somewhat soft of detail, as is common with injection-moulded plastic, but they're not too bad, and they're satisfyingly chunky compared with some of PSC's earlier offerings. The sculpting is decently round, taking into account the limitations of the medium, and they don't look as flat as some injection-moulded figures do (such as some of the figures from their companion set of early-war support weapons).

The "command" sprues give you a senior officer in a peaked cap, five junior officers and/or NCOs with MP40 submachine guns and other weapons, including one with what appears to be a signal pistol. It also contains components to assemble a 2-man 50mm mortar team, and a 2-man ATR team.


Overall, I like them. The sculpting is good, and there's a lot less multi-part assembly required than I've experienced with some of PSC's other sets, such as their late-war German grenadiers or their Soviet infantry. They look to me like they'll paint up well.

The weapon mix is more suitable for the latter part of the period they're intended for, as there are more MG teams available than would have been present in the campaigns in Poland or France, for example. However, they did soon start to bump up the number of MG34 per section, so I guess it's better to have them supplied than not.

All in all, I'm pretty happy with them.

Sunday 1 December 2019

FlakPanzer 1

This is my 15mm (1:100 scale) 3d printed FlakPanzer 1, a 20mm AA gun mounted on a Panzer 1 chassis.

The model came from Tiger Ace1945's Panzer 1 Pack on Thingiverse. I replaced the barrel with one made from a dressmaker's pin, and the gunner is a 15mm Command Decision German artilleryman from Old Glory.

I think it needs another crewman, so I'll probably add one, one of these days. I'm not usually one who bases his vehicles, but this one needs a base because of the trailer.
NOTE: It no longer needs the base because the wind through an open window sent it flying, and the trailer broke off and is nowhere to be found. Not to worry, it was largely cosmetic anyway, and I can always print another if I really want to.

Saturday 30 November 2019

Cleaning up FDM prints

Cleanup tools for PLA filament
One way in which FDM prints fall down compared with resin prints or traditionally moulded and cast models is in the visible layer lines that show up, even when running the printer right at the limits of its capabilities.

Printed at a layer height of 0.06mm
Most of the time, the layer lines aren't actually that much of a problem, especially for my purposes, which are primarily tabletop gaming. A decent paint job will disguise most of the problem, and during a game, the right silhouette is much more important than the miniscule details on a model.

However, from time to time, I do like to smooth out layer lines or other printing artifacts.

The fact is, there's no instant, automated way of doing that with PLA filament. ABS can be smoothed out (though with the loss of sharp detail) by melting the surface with an acetone fume bath, but that does absolutely nothing to PLA. To smooth out PLA, we have to resort to manual labour.

The tools I use are simple: a couple of fine needle files, and a couple of scrapers I made from stainless steel laboratory spatulas.

The process is also simple: I just file and scrape at the surfaces of the model until they're acceptably smooth enough to be painted. Quite often, that doesn't have to be completely smooth; just knocking off the corners of the layers of plastic is enough to give me a markedly better appearance once painted. It's a tedious process, but not difficult.

I use files in preference to grinding with sandpaper or diamond pads, because the teeth of files actually cuts away the surface of the plastic cleanly, whereas sandpaper, even in very fine grits, just abrades it roughly. You can get a very good surface with sandpaper, but you need to go down through a series of progressively finer and finer grits until the surface abrasion becomes effectively invisible. Files are a lot faster.

Friday 29 November 2019

Are These The Droids You're Looking For?


I've made a couple of quick, simple Star Wars-ish droids for 3d printing. They're available download (free) at https://www.thingiverse.com/thing:4006771

The one on the far left was printed at 100% scale, the other two at 75%, and they're sitting on laser-cut 3mm MDF bases. The figure is a 35mm WotC pre-painted Rebel Pilot.

Thursday 21 November 2019

Dragons Teeth


I've made myself some modular dragons teeth tank traps for my 15mm WWII games.

They're 3d printed, and the STLs are downloadable from https://www.thingiverse.com/thing:3988309

I was considering putting a low-wire entanglement between the concrete bollards, as was often done to hamper infantry as well as vehicles, but decided against it. I may change my mind later on.

Sunday 17 November 2019

Afrika Korps in 15mm — a beginning is made

Having made the decision to stick with 15mm for my Afrika Korps, I've had the 3d printer working overtime to get the core of the Korps established.

The only one of these models that isn't 3d printed is the painted Panzer IV F1 at centre rear; that's a 1:100 (15mm) PSC model.

I'll do another couple of Panzer IV D, and then I'll get on to transports and things. Anti-tank guns might be an issue, I'll probably have to buy those, along with some infantry. I think I might have a BF PaK 38 in amongst my stuff; I shall have to see if I can dig it out. And I have some other useful bits and pieces from the PSC 15mm early-war German heavy weapons box that can be painted in desert yellow and put into service.

Friday 15 November 2019

Vallejo Caunter Set

 I just got a set of Vallejo ModelAir paints that I'd ordered some time ago, their Caunter British Colors set.

In fact it's not just for the Caunter scheme, as it includes BSC 61 Light Stone and BSC 49 Purple Brown, used after the Caunter scheme was prevalent, and Khaki Green No.3 which was the standard base colour in which pretty much everything was painted for Home Service and France.

I've been using mix recipes for all of these, of variable reliability, but it's convenient to have a pre-mixed solution that I can just pour out of a bottle.

The colour described in the Caunter scheme as Slate Grey is named here Dark Green, and I don't know if that's because Vallejo are trying to replicate the British early-war Dark Green No.4 or if they've just mis-named the Caunter shade.

I've not even sure if the two paint colours were actually different, in fact. They may well not have been, and simply been named differently in different painting specifications of the time.

I've been using Vallejo German Field Grey for Slate Grey, and that does seem to be quite similar to the colour they've presented here. I've been using Olive Grey for Dark Green No.4, and that looks OK to my eye, so I'll probably just carry on with that.

Wednesday 13 November 2019

More Scale Comparison Dithering

Left to right:
Battlefront 1:100 (15mm) PzIII Flammpanzer
3d printed M.Bergman 1:200 PzIII L
Ancient GHQ 1:285 PzIII J
I've been fiddling around the edges of building some WWII desert forces, and now my procrastination and prevarication has come to a head: which scale should I commit to?

They each have their pros and cons.

I already have a few 1:100 (15mm) bits and pieces, mainly British and Italian. I don't have any Afrika Korps infantry, but that's fairly easily remediable, and I have access to digital models of pretty much all the vehicles I'd really need. The down-side is that they take a while to print and they do need quite a bit of painting to look good, and also they're large enough that my 900 x 1800 mm tabletop really doesn't look like wide open desert when I'm using 15mm stuff on it. It's fine for a game like Chain of Command, a bit cramped for something like WRG 1925-50, Fist Full of TOWs or Battlegroup.

1:150 (10mm) isn't really all that much smaller than 1:100, and needs pretty much as much attention to painting as 15mm models. The benefits of that scale, such as they are, don't outweigh the fact that I already have a decent head-start on the models I need in 15mm.

I'm completely new to 1:200, so I would be starting from scratch, needing not only the vehicle models, but also buildings and similar terrain — fortunately, buildings aren't a very prominent feature of a lot of WWII desert battlefields. I can print most of what I'd need, and a tank like the Panzer III shown here only takes about an hour and a half. Painting to an acceptable standard is pretty easy. I'd probably have to use 10mm infantry from somebody like Pendraken, and they'd look a bit big next to the 1:200 vehicles and guns; that is a concern. Also, since nobody I know locally has a 1:200 scale force of their own, I would have to provide the troops for the Commonwealth, Italy, and Germany to be sure of having sufficient forces for a battle. This scale is small enough that my gaming table starts looking acceptably large, and the models are small enough for big battles while still being large enough to distinguish easily.

1:300 - 1:285 is a scale that I already have quite a lot of, and it's a scale that works well on a fairly small table, or makes a moderate-sized table like mine look positively huge. The only issue with it, from my point of view, is that with age my eyesight has deteriorated somewhat, and the models and figures on the tabletop have become difficult to see properly unless I'm sitting right over them. I'm not so blind that they're unusable, but the fact remains that my eyes are not as good as they once were, and it's tiresome having to squint and peer to make out what I'm looking at.
LATER:     I've decided to stick with 15mm for the present moment. It's logistically more convenient in every way than starting on a whole new scale that nobody else in Christchurch has ever heard of, plus, I can build on the few bits and pieces I've already got in that scale.

Thursday 31 October 2019

BAOR Beginnings (Again)

I've made a start on a 1/150 scale 1980s BAOR force. I've done this before, not too long ago, in 1/300 scale, but this scale will be easier for me to see and manipulate on the table. I'll mostly just be replicating that micro-scale army in 1/150 really.

I never actually got much use out of the 1/300 scale stuff, and I'm still pretty ignorant of post-WWII equipment and doctrine, but if they maintain the quality of their WWII stuff, I expect NORTHAG will serve pretty well as a broad-strokes introduction to the period.

The infantry are going to be the problematic part. I can print them OK, but at the moment I have no digital models specifically for 1980s British troops, and I'll quite likely end up having to sculpt some.

Wednesday 30 October 2019

Cura Profiles — 1/150 Comparison Prints

With the imminent release of NORTHAG I've become interested in printing some 1980s BAOR stuff in 1/150 scale. I thought I would do a comparison test to see what sort of printing time to quality trade-offs I could afford to make. I don't require diorama-quality models for my wargaming pieces, but I do like them to look decent at least.

The test-bed model I chose is a Chieftain tank, modeled by a chap who goes by the Thingiverse moniker of Captain_Ahab_62. It was modeled in 1/100 scale, but intended to be printed scaled down to 1/285; I've scaled it down to 1/150.

All of them were sliced in Cura 4.1 and printed on my Creality Ender 3 in eSun PLA+. All were printed on a raft, using tree supports with support roofs enabled. All are shown straight off the printer, without any cleanup at all.

This is printed with the FDG Minis profile I've got into the habit of using for my 15mm stuff.
The layer height is 0.08mm, print time was 8 hours 22 minutes.

This one uses Cura's built-in "Extra Fine" profile.
Layer height is 0.06mm, print time was 5 hours 57 minutes.

This one also uses a built-in Cura "Fine" profile.
Layer height is 0.1mm, print time was 3 hours 31 minutes.
The higher speed of the built-in Cura profiles appears to have given me a bit of ringing in vertical surfaces, but I doubt that that would be very apparent under a coat of paint, and the advantage in print times over that of the FDG profile is substantial. The Fine profile renders adequate results for playing pieces, and it is quite quick, but the Extra Fine profile is markedly superior, and still fast enough that I could get three tanks off the printer in a day's run, so unless there's a matter of great urgency, that's probably what I'll use.

Tuesday 29 October 2019

12mm Remix

Original model

Remixed model
I had a go at remixing/remodeling one of the 12mm WWII British infantry by LoxFil that I wrote about in a previous post. The original model is on the left here, the remix on the right.

I did it just to see what I could make of the figures, treating them as mannequins, and in general I think they'd do fairly well. They could probably be rescaled to 15-18mm without any major issues, but they'd have to be printed on a resin printer I think — my Ender 3 would struggle to resolve much, if any, of the new detail, especially at 12mm scale.

The chunkiness of the original is advantageous for wargaming figures in these small scales. If they were closer to actual scale dimensions, they'd not only be a lot more fragile and difficult to print, but they'd also look far too thin and wimpy.

I doubt very much that I'll go any further than this with these figures; I have no plans to start doing WWII in 1/144 or 1/150 scale. However, I am thinking about building a 1980s BAOR force in that scale for NORTHAG when it appears, so maybe I'll do something in that line. Though a 12mm SLR barrel will be a tricky thing to print.

Tuesday 22 October 2019

Wall of 3d Printed Fire

I found the STLs for this on Thingiverse, but foolishly neglected to take note of exactly where. Hey-ho. This lot took about seven hours to print on my Ender 3, and about another twenty minutes or so to paint.

I haven't really gone in for spell effect models for tabletop minis in the past, but for persistent effects like this they can be quite useful. In fact, 2d printouts, pasted to cardboard and cut, out would be just as useful, and wouldn't look any worse — in fact they may even look better. And they'd almost certainly take me less than seven hours to prepare. But never mind, I've got these now, and they'll serve my needs just fine.

Thursday 17 October 2019

Art & Arcana

This arrived for me today from the Book Depository. It's not the sort of thing I'd normally lay out my own money on, I had a bit of spare built up in my PayPal "buying toys and shit" account. It cost me about $54 in Kiwibucks.

It's an illustrated history of D&D from its earliest days right up to the present-ish (that being 2018), and is plentifully illustrated with art from every edition of the game, plus some of the peripheral TSR properties like their collectable cards, computer games, Dungeon board game, and Dragon magazine.

It doesn't go into minute detail, but it covers everything (as far as I'm aware). It's an interesting potted history of a game that has been perennially important throughout my adult life. Interesting, that is, if you're interested in that sort of thing.

It's a pretty hefty tome; I haven't weighed it, but it's heavy enough to make me very grateful for the Book Depository's free worldwide shipping.

Wednesday 16 October 2019

Kfz 14

Adler Kfz 14
I've been wrestling with putting together this Kfz 14 radio car, from a base model by Bergman or TigerAce1945, I can't remember which.

I took off the original wheels (which was quite a task, as the mesh was a bit of a shambles) and made some new ones, and I added the aerial and radio station in the back. New bonnet, new engine grill... probably should re-do the mudguards as well. Come to think of it, there's not a hell of a lot of the original mesh left at all.

The print is OK, but not amazing — I'd really like to have access to a DLP or SLA resin printer, which would produce a much cleaner model.

The crew are a couple of 15mm Skytrex figures, artillery crewmen in fact. I dropped the officer on to his face and squished his nose a bit.

The vehicle is painted in the grey and brown of the very early WWII period, during the first Blitzkrieg era in Poland and the Low Countries. Unfortunately I painted the white cross on the starboard side rather too large; I might see if I can redo it, but it's not a terribly high priority.

That's a cul-de-sac, all right

Saturday 5 October 2019

12mm Minis


I found these fairly crude 12mm figures, designed by Фил Лохмин, and out of curiosity I printed up a set on my Ender 3. These are printed at 0.08mm in eSun PLA.

Airfix 8th Army HO/OO
When I say crude, I mean it. These are even less detailed than the old Airfix HO/OO figures from the 1960s. However, they're identifiably human, and I can tell the difference between a rifle and a Bren, so they'd be quite usable as gaming pieces, if not as diorama-quality miniatures. The FDM printer isn't the ideal machine to print them on; they'd be much better done on a resin printer, but FDM is what I've got.

They're OK in terms of proportions, for the most part, and they'd probably be fine as a starting point if I wanted to sculpt a bit more detail and bit less geometric blockiness into them, but I doubt that I'll be motivated to do that in the short term since I'm not intending on swapping my wargaming allegiance to 12mm at this time.

The vehicle is Bergman design, a 25 pounder Bishop SPG, scaled up to 1/150 from one of his 1/200 scale models.

Tuesday 1 October 2019

Wrestling With Shermans

Sherman II at El Alamein, by Steven Zaloga
 To date, I've been concentrating my WWII Western Desert modelling on the early period, up to 1941 and Operation Crusader. Now I'm extending that out a bit towards the era of Operation Lightfoot and the battles of El Alamein.

To that end, I thought I might want some Shermans, and the one I like the best is the M4A1, known to the Brits as the Sherman II. I like it because its cast hull is so rounded and cuddly.


Zachary Kavulich has already designed a model of the M4A1, so that's where I started.

I reattached the tracks to the hull (Zac has them as separate objects) and filled in the voids under the sand shields. There were some very thin walls on the sand shields that I knew from experience would cause me issues in printing.

I initially printed it sitting horizontally on its tracks, and sliced it sunk down into the bed by about 0.3mm to get a smooth face along the bottom run of the tracks for best adhesion on the print bed.

The results were OK, but the characteristic fluting on the bogies was lost — I'm using a 0.4mm nozzle, too large to render vertical details that small. I could probably suggest the detail with paint, but I thought I could probably get it to print if I went about it another way.


The next version's hull was split up fore and aft (see below) and printed standing vertically.

This gave me very good results on the upper hull, but resulted in multiple issue in the running gear. Unsupported wheels partially failed, and the grooves of the track detail created very weak strips that also failed.


So, more modifications.

I flattened out the underneath of the tracks to remove the weak indentations, and took the opportunity to add some track guides and studs to provide a bit more track detail to look at.

That fixed the issues with the tracks themselves, but there are still problems with wheel failures which I will need to address, All in all though, it's come together fairly successfully.

Chopping It Up

I use 3d Builder, which comes bundled with Windows 10, for this task.

The Split utility is found under the Edit menu, and is pretty intuitive to use. You can move and rotate the split plane manually, or enter precise values in the dialogue at the bottom of the screen.

Just remember to enable Keep Both or else when you confirm the split, it will delete one half or the other.


While the two halves are still in place, but separated, I added a couple of location holes, 2mm in diameter by 6mm deep.

I can use short lengths of 1.75mm filament in these holes to ensure accurate placement of the two halves when I come to glue them together.

Then I rotate each half so that it's standing up on the split plane, and go to Object > Settle to make sure they're both sitting flat on the print bed, and at the same level.

Then, last of all Save As... to a new filename. 3d Builder defaults to its own file format, .3dm, which is much better than .stl. Cura will open .3dm files, but they usually have to then be manually placed on the print bed, so purely out of laziness I usually save to .stl format in spite of the shortcomings of the file type.


This is how the new STL looks once it's in Cura for slicing.
And this is how it looks fresh off the printer.

Almost all that stringing is from support to support, rather than attached to the model itself, so there's very little cleanup necessary once the supports have been removed.

Incidentally, this is how I deal with the turrets of all my tanks and things for wargaming.

I glue a 6mm x 1mm rare earth magnet in the bottom of the turret plug, and a nail head in the floor of the turret hole in the hull. This allows the turret to rotate freely, while still being held securely. The magnet is strong enough that the whole model can be lifted by the turret, if need be.

I model sockets to accommodate the magnet and nail head in all my models. The socket in the hull has a central hole that goes right through, allowing the end of the nail head to just peep out for gluing.

I ensure that they're located accurately with respect to each other by first gluing the magnet in place, then sticking the nail head to that, and lowering the whole lot together into place in the turret socket. Then I push epoxy glue down into the hole through the hull from below, so that it grabs the shaft of the nail head without getting all over the turret plug itself.

And more...

Redesigned turret with hatch open

...and including a commander
I went a bit further and remixed Zac Kuvalich's turret to open the commander's hatch, and I added a bit of seam detail to the turret box as well.

I've printed a few of these, and it works just fine. I'll probably use some PSC tank commanders in them, or whatever I can find in my bits box.

I also designed a separate commander figure (right) but my FDM printer is unlikely to render any of that detail very well. It'll be nice to have around if I ever get a resin printer though.