Wednesday 29 December 2021

Model Photo Colour Balancing

1: White background
2: Black background
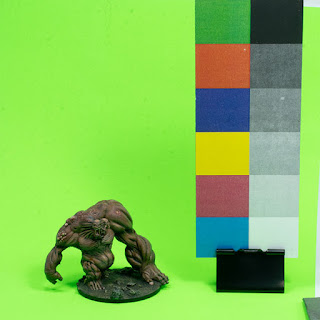
3: Fluoro green background
4: Fluoro green — no swatches

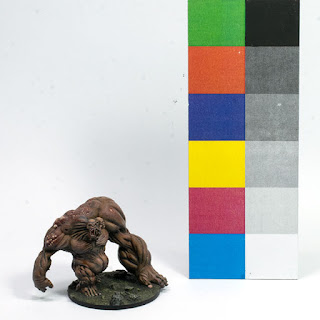
I've been experimenting for a while with using a colour and tone swatch card in an attempt to get more reliable colour balancing and exposure with the automated controls of my camera.

It can only help so much with strongly coloured backgrounds though; you can see that there's considerable colour contamination from the green background, but that's due to reflection, not the camera's own colour handling.

Of all of them, it seems to be most successful with a black background, though the white background is fine as far as colour goes — it just overwhelms the tones of the model itself. The model on the black background would be more successful still if I used a reflector to get some light into its shadows, and it could do with a touch more exposure too; you can see the greyness of the white swatch compared with that on the white background.

Of the two with the green background, the one with the swatch card in frame is the more accurate colour-wise, though again it could do with a little more exposure. In the other one the camera has blown out the background quite substantially to expose the model better.

The swatch card I've used is just something that I printed on my cheap laser printer, though I've painted over the black and white swatches to get them as clean as possible. You can buy similar cards, properly calibrated for studio photography, but they're not cheap, and all you really need is something close enough. As long as you have a repeatable reference colour/tone set to match against, you have a baseline constant to work from.

Saturday 25 December 2021

Old-Style Pig-Faced Orc


This is a figure that was inspired in style very heavily by the clunky old Minifigs pig-faced orcs of the 1970s. It's not an exact match to those old lead figures, but it's fairly close I think. The hardest things about the sculpting really was keeping its pose as stiff and awkward as the originals, and resisting the urge to add any more detail.

The only point at which I departed from the design of those old figures is in the shield. I used instead the shields as shown in the AD&D Monster Manual.

I rendered it as if it was an old soft plastic figure, the sort of toy you might have once got in a box of cereal. It seemed like an appropriate aesthetic for this thing.

The STL is on Thingiverse at https://www.thingiverse.com/thing:5173812

Thursday 23 December 2021

Soviet Maxim Team c.1939


Here's a 15mm Soviet Maxim machine gun team from about 1939-40, the period of the Winter War between the Soviet Union and Finland. The troops are wearing the old-style crested helmet and puttees, which dates them: they could also serve as soldiers in the early months of Operation Barbarossa in 1941, before the new uniform changes became general throughout the Soviet armies.

The figures are 3d printed on my Elegoo Mars Pro, and the digital design is by the excellent Propylene Foliescu.

Sunday 19 December 2021

BA-27M (1931)

The figures are 15mm plastic Russians from PSC

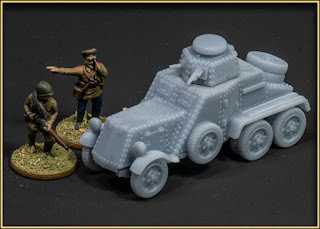
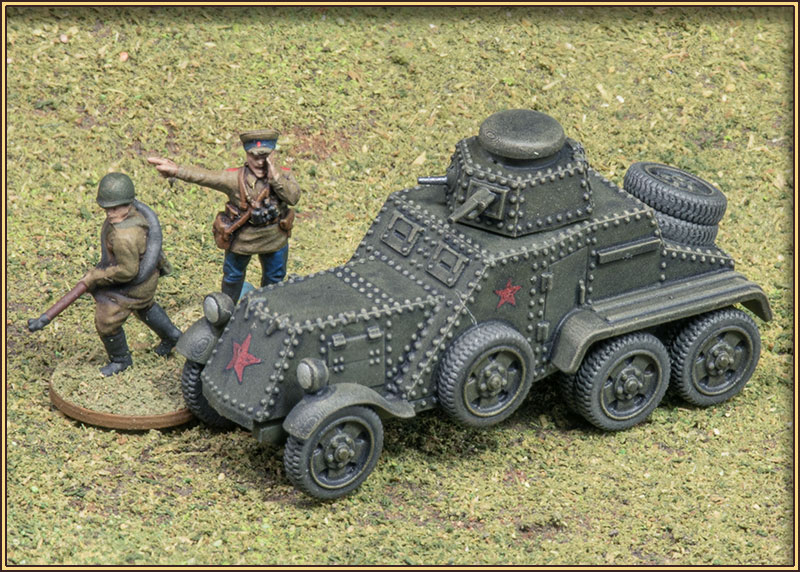
Here's the test print of my latest 1:100 (15mm) digital model, a Soviet BA-27M armoured car of 1931. There were still about 120 of them in service when the Germans invaded in 1941, so although it was an interwar design, it also counts as WWII equipment for the Soviets, and captured examples were also taken into German service.

It mounts the same turret as used on the T-18 tank, with a copy of the French Puteaux 37mm gun and a 7.62mm machine-gun.

The STLs are available at https://www.wargaming3d.com/pro.../ba-27m-armoured-car-1931/


And here it is in a coat of paint. It could probably do with a bit more panel highlighting; that overall 4BO green tends to look a bit bland in small scales.


Thursday 16 December 2021

DMing Hiatus (again)

 I managed to paint myself into an inescapable corner with my AD&D campaign, and burned myself out trying to find some way to wriggle out of it. So, I'm taking a rest from DMing for a time, while I regather my mojo.

My problem is that I tend towards grandiose world-shaking plotlines, and that alway turns out to be too much weight to carry. Especially since my predictions of how any given player will react to a situation always turn out to be wrong. I have tried second-guessing myself, on the assumption that I'll be wrong, so I plan for the other likelihood, whereupon (of course) they'll always choose the original path. Hey-ho.

I think I'd be better scaling things back to a much more localised episodic murderhobo campaign — simple loot-gathering, and maybe some "Seven Samurai" defending-the-peasantry scenarios so that the paladin can get some moral satisfaction.

I'm still left with the problem of how to get out of the current campaign believably, but maybe I'll just ignore believability and do a "with a bound they were free" scene shift and ignore the whole thing.

Wednesday 15 December 2021

6mm Napoleonic Experiment


Just out of curiosity, I decided to try printing some 6mm Napoleonics, just to see what the possibilities are. These particular ones are scaled down from some 15mm sculpts I found on Thingiverse.

They're shown here (on the left) in their 1805 stovepipe shakos beside some Heroics & Ros Waterloo British infantry of 1815.

They printed just fine, though they're extremely delicate — almost certainly too delicate for the sort of handling wargaming figures get. However, seeing them next to their metal equivalents shows me that I can afford to make them much more squat and dwarfish, and thus a lot stronger.

Napoleonics in 6mm are very much an "en masse" spectacle, so the look of a whole battalion is much more important than an individual figure. I could get away with quite a lot in terms of figure design and still end up with something that looks quite okay in the ranks.

Friday 10 December 2021

More 15mm Figure Sculpting


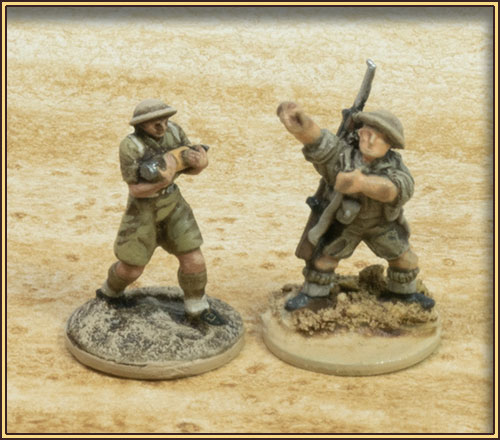
I've been experimenting with a new (to me) method of digitally sculpting 15mm figures in Blender, using a combination of rigging and assembly, and the first finished fruit of my labour is this 8th Army artilleryman, on the left. I've included an old metal Battlefront figure for scale.

That shell he's carrying is about the size for a 7.2" howitzer, which would make him a mighty Hercules of a man, since those things weighed just a tad over 200 pounds each.

I find I'll need to exaggerate surface detail like webbing and facial features quite a lot if I want them to resolve with the printer I have.

Tuesday 7 December 2021

In Progress...


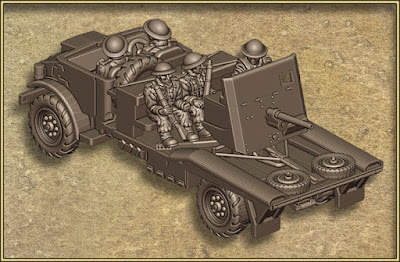
In the foreground is the first test print of the 15mm 2pdr portee I recently bashed together. It's just in its primer underpants at the moment, and there's a bunch of stowage to go on yet.

Behind it, a Crusader III (left) and a Crusader I (or maybe II) in Caunter. The appearance of the Crusader in North Africa only overlapped the official existence of the Caunter scheme by a couple of months, but that's enough excuse for me to paint a Cauntered-up Crusader.

I printed the Crusader I in FDM before I got my Mars Pro resin printer, and I thought it was pretty sweet at the time. Hoo boy, the difference in surface quality between that and the resin Crusader III is pretty stark — it doesn't look so egregious here, because they're both out of focus. Still, it will serve perfectly well as a wargaming model.

Sunday 5 December 2021

CMP 2-pounder Portee


I've spent the afternoon bashing together a CMP 2 pounder portee from various sources. The lorry is cut down from one of Bergman's CMP 3-tonners, with new wheels and accoutrements. The 2 pounder and gunner come from 3dBreed, and the rest of the crew are my own sculpts.

Note: because so much of the IP in this model is not my own, the STL will not be available for distribution. Sorry about that.


Later...

I've since added the wheels for the 2 pounder, and the two ramps that were used to get the gun on and off the truck.

There was another method of carrying the wheels, that had them in a pair of buckets off the end of the truck bed — I think, judging by the preponderance of photos, that that was the more common arrangement. However, I had room to put them on the bed (secured by wing-nuts) so I did, mainly because it would hugely simplify 3d printing, which is already going to be a bit tricky.

Judging by photos of the thing in action, it should also be piled high with all kinds of tarps and knapsacks and buckets and all manner of tat. That sort of stuff can be added later, via traditional modelling methods, which will give some individuality to different models.

Wednesday 1 December 2021

CMP 15cwt


This is an experimental 1:100 (15mm) model of the CMP 15cwt utility truck, a variation of one that I designed some considerable time ago.

At the time I didn't have a resin printer, and I never got very satisfactory results printing the ribs of the tilt frame in FDM. So I did a quick redesign of that model to remove the frame entirely, and put some sockets in the walls of the cargo bed for wire ribs instead. The wire not only gives me a cleaner result, but a much sturdier one to boot — much more likely to survive wargamers' fumble-fingers on the tabletop.


I also designed and printed a bending jig to make sure that they are all the same size and profile.

The jig isn't particularly successful; it worked to a degree, but I think there must be a better way to do it.

I see from photos of the original vehicle that there should be some horizontal spreaders between the ribs. Maybe I'll get around to doing something about them some time.

I used 1mm aluminium tying-off wire for this proof-of-concept model, and it's okay, but some 0.5mm x 1mm brass strip would do a better job I think.


Next day...

I made a matching female part for the jig, so that I can squish the wire between the two, and that works a lot better.

In this photo I've tried a couple of alternative materials for the frame: copper wire (0.95mm) and soft iron florists' wire (0.89mm). I don't know what those measurements equate to in gauge. Both are a little bit heavy; something about 0.7 to 0.8mm would be better. The copper is easier to work with than the iron, mainly because it's polished and therefore slipperier.

Edit: Looks like those measurements turn out to 19 and 20 gauge respectively, for the copper and the iron.


 Coupla days...

Here are the two that I've completed so far, alongside an old Battlefront 15mm pointing-at-the-sky guy.

The stores in the back of the truck in the foreground are some modules I originally designed and printed to go in the back of my Chenillette, plus a rolled-up tarp made from epoxy putty.