Showing posts with label tank. Show all posts

Tuesday, 9 February 2021

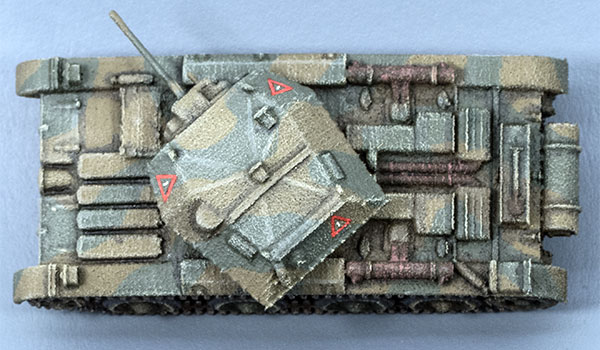
Panzer 35(t) (15mm)


As well as returning much better print quality,
the Mars prints a lot faster than my Ender 3.
A model like this prints in about two hours on the Mars
at 0.05mm layer height, while on the Ender 3 at 0.1mm
it would take 6 to 8 hours each.
This is a remix I've done of Bergman's 1:100 scale (15mm) Panzer 35(t).

I've refined a lot of the detail; most of the work has been in replacing all the rivets. So many rivets. So many.

I was considering upgrading the track tread detail as well, and I may revisit this decision, but I decided that for a wargaming model it wasn't worth the trouble.

First print, primed with
Vallejo Surface Primer

The first test printing went well, except that the gun barrel proved to be too thin and fragile, and it broke off while I was cleaning the print up.

I thickened it up a bit in the file, and subsequent prints have gone without a hitch.

It would be a simple matter to just reprint the bung model, but why go the easy way when there's a more difficult path to follow?

So I decided to replace the broken gun.


I turned up a new gun barrel from a small piece of brazing rod on my little mini-lathe.

The result is not nearly as clean as could be achieved on a proper watchmaker's lathe, but it will serve the purpose.

Once glued in place it looks the part well enough. It's thicker than a truly to scale gun would be, but in this small scale it looks about right, which is the main thing.

Plus, I can pretty much guarantee that this gun barrel is never going to get broken.

Sunday, 10 May 2020

Grant (1:100)

I've designed a 1:100 scale M3 Grant tank for 3d printing, to give my desert-war Brits a decent gun before their Shermans start arriving.


This is the first test-print off my Ender 3, and by and large it's turned out OK I think.


Below is a comparison between Battlefront's old resin and metal kit (left) and my 3d print (right). As you can see, the Battlefront kit is substantially taller than my model, but I have double-checked my measurements and I'm confident that I'm right and they were wrong.


Sunday, 19 May 2019

Grey Tiger

This is an earlyish version of the Tiger 1, the PzKfw VI, before the changeover to the dunkelgelb base colour that occurred in February, 1943.

This is how the Tigers would have appeared soon after their appearance in Russia in 1942. The very first examples did not have the turret storage bin, but they were quickly fitted to all of them, and I've included it on this one for no other reason that that I think it looks better.

The model is 1:100 scale (15mm), from PSC. It's a very straightforward build, and the sprues provide parts for vehicles from early, mid, or late production.

Top view


Here it is, for comparison, with the old Battlefront resin/metal casting. I like the weight of the old models, but I like the price of the newer plastic ones much more.

I was surprised to learn that US Army testing showed that the Tiger's 88mm L56 was incapable of penetrating the upper glacis of the Sherman's hull front at any range. However, it had no trouble at all punching through the transmission housing or the turret front at over a thousand metres, so I guess that was small comfort.

The poor old 75mm Shermans, on the other hand, couldn't do squat to the Tiger's frontal armour even right at muzzle-point, and had to get to within 100 metres to have any hope of a side penetration.

Saturday, 16 March 2019

Char 2C (1:100)

The Char 2C (also known as FCM 2C) was a French super-heavy tank of the Interwar period, and went into service in 1921. I don't believe any of them ever saw action; those that were in service in 1940 when Germany invaded were either abandoned, or were destroyed by aerial bombing while still on the rail-cars waiting to take them to the front.

As such, this is yet another model that is of pretty limited use on the wargames table, but as usual I don't see that as a particular impediment to designing one for 3d printing.

I originally found a model of it on Thingiverse, but the geometry of that model was so bad that I found myself spending more effort on trying to fix it than I would have spent in designing a model of my own. So that's what I did. It's primarily based on drawings in one of George Bradford's books, plus various photographs I found on the internet. This is one of those vehicles that existed in a variety of configurations, so I make no guarantees as to absolute accuracy. However, it does look like what it's meant to be, which is a good start for a wargaming model.

This model is designed at 1:100 scale for 15mm gaming, and it's in several pieces for ease of printing — this image has been assembled digitally. As of writing, I have the last pieces on the printer and, all going well, I should be able to put it together tomorrow morning.


Next Day....


Here's the first test print (0.08mm layers, eSun PLA+), all assembled.

Unfortunately I got some pretty bad under-extrusion on the turrets, and they'll have to be reprinted, but it's done its job to let me know what works and what needs to be addressed.

The main thing (apart from the missing lifting lugs) is that, to ease assembly, it really needs some locating sockets that I can put bits of filament in to make sure the pieces go together in exactly the right place. This was done all by eye, which works, but isn't ideal.

There's a lot of printing in this — all together, for all the components, it took me about 23 hours. The track runs alone took 15 or 16; I split them each in half fore and aft and printed them standing up. I tried a config in Cura where I printed them each in one piece lying down flat on the print bed, and that timed out at about 9.5 hours (probably more like 11, knowing Cura's estimates). However, I find I get better, cleaner surface detail on vertical than horizontal surfaces.

Friday, 8 February 2019

M11/39 Troop

Here's a troop of what was probably one of the worst tanks to see service in the Western Desert, and considering the competition that's quite an achievement.

The Italian Fiat M11/39 had a main armament of an obsolete 37mm gun mounted in the hull, which meant that not only could it not operate effectively hull-down, it also had a very limited traverse, so to engage targets to its flanks the whole tank had to be rotated. It did have a rotating turret, but that just mounted a pair of rifle-calibre machine-guns. To add to its shortcomings, it was slow and somewhat unreliable, and its armour was proof against small arms only. Even the Vickers Lights were more than a match for it, being much faster and more maneuverable, and the .50 Vickers and the 15mm BESA could both readily penetrate its armour.

These 1:100 scale (15mm) models were 3d printed on my Ender 3 FDM printer. Overall they're OK models, but the 37mm is way out of scale so that it would print reliably — one of these days I might lop them off and replace them with barrels turned down from brazing rod.

The model is available for download on Thingiverse at https://www.thingiverse.com/thing:3385848

Thursday, 31 January 2019

M13/40 – Test Paint


Here's my 1:100 Fiat M13/40 model, printed and painted, along with a couple of Battlefront 15mm Italians.

Overall I'm reasonably happy with it, but I'd like to fine-tune the gun barrel a bit — the step-down in thickness shouldn't be quite so marked. That'll be easy enough to do.


A few days later...

Here's the whole troop of M13/40 completed. You can see the modified gun barrel on the left and centre models; they look a lot less clunky now.

The tactical markings may be of limited usefulness for tabletop identification, considering the parlous state of my eyesight.

Wednesday, 30 January 2019

Fiat M13/40

STLs available on Thingiverse at https://www.thingiverse.com/thing:3391234
Those who have paid any attention to my maunderings recently might recall that I mentioned something about using my 3d-printed M15/42 models as tabletop stand-ins for the M13-40.

Well, yeah. That's sort of been modified as a plan, because I accidentally made a digital 1:100 scale M13/40, which I will print some of over the next few days. I used m_bergman's excellent little 1:200 scale version as the basis, but added and/or refined a huge amount of the detail.

I used it as a teaching project to familiarise myself a bit with Blender's new version 2.80 (still in Beta). There's a lot I like about the new version, but a lot too that frustrates the hell out of me, and which has slowed down my work-flow quite a lot. One of the most infuriating things about it is the way it often leaps into Perspective view when I'm moving around the model in Orthographic view; I haven't found any way to restrict it only to orthographic as yet.

So anyway, now I have a digital model of the M13/40, which is sure to come in handy.

Monday, 28 January 2019

M11/39 — a truly terrible tank

The STLs are available on Thingiverse at https://www.thingiverse.com/thing:3385848
 I've been remodeling m_bergman's 1/200 scale Italian WWII M11/39 tank, up-scaling it to 1/100 scale and adding and refining a lot of detail. I had to strip away all of the running gear and replace it with completely new geometry; not a straightforward task at all, but I got a decent result in the end.

The original model was fine for silhouette, but it was pretty chunky, for reliability in printing in the smaller scale. It's still a bit chunky — the 37mm gun is out of scale for a start — but it will look OK on the tabletop, and that's the most important thing.

These things were already obsolete at the beginning of WWII. They did OK against machine-gun-armed Vickers light tanks in Libya and Egypt, but that was about the limit of their usefulness. They were quickly replaced by the M13/40, which added some armour and moved the main gun to a larger revolving turret.

Test Print

Assembled and primed


The first test print was reasonably OK, but it has identified a couple of issues.

The stem of the turret plug was a fraction too long, so the turret doesn't sit snugly down on the hull top. That was easy enough to fix.

The 37mm main gun is more problematic. Because it's printed standing vertically (the hull being printed in two halves, front and back) any tremors in the printer show up glaringly, especially if, like mine, your printer is not absolutely perfectly dialled in. It might be better to remove it entirely maybe, and print it horizontally as a separate piece, or even replace it completely with a turned brass gun. Not least because it's way out of scale.

I'm pleased with the way the running gear turned out though. I think it does make a marked improvement, having some detail in the tracks themselves.

Thursday, 13 December 2018

Vickers Light Mk.VI (15mm, 3d print)

Vickers Light Tank Mk.VIc.
The figure is a 15mm BEF infantryman by Battlefront
 The most common tank in the British arsenal at the beginning of WWII was the Vickers Light Tank Mk.VI, in two main variants: the VIb (pictured below), armed with one .50 and one .303 Vickers machine-gun, and the VIc (right) with a 15mm BESA and co-axial 7.92mm BESA machine-gun.

Despite being the most common tank available to the BEF, I've had none at all in my wargaming force, because they are frankly pretty crap. They're bullet-proof (just), but fall to bits if confronted with anything heavier than rifle-calibre missiles, and their armament is wholly inadequate against almost any other tank, allied or enemy, they're likely to encounter in France.

However, I thought in the interests of historical veracity I'd better make some, so I have, half a dozen, which should provide plenty of cheap and easy targets for the Dirty Nazis.

Mk.VIc rear

Mk.VIb
The hull for the Mk.VIb and Mk.VIc is essentially identical, so I've just printed a pair of turrets for each hull.

The "B" markings for this particular model are made up, and will be different to all the others. That's because this one, the first one I printed, does not have turrets interchangeable with any of the other hulls, while the others all are, and I want to be able to distinguish it at a glance.

Friday, 7 December 2018

A10 Cruisers (15mm, 3d print)

This is a pair of 3d printed 1:100 scale British WWII A10 Cruisers, along with some 15mm Battlefront BEF figures in my sabot bases. The model is by m_bergman (or possibly TigerAce1945, I'm not 100% sure), very slightly modified by me.

There are some definite issues with these prints: the side shields didn't print, I suspect because they were too thin, and I got a bit of warping on the turret base, a problem I haven't had to deal with for months. Also, on one of them there is a slight layer shift with associated under-extrusion, and what might have caused that I don't yet know. However, neither of them is so poor that it needs to be binned, and they'll do fine on the wargames table.

I am going to have to do a bit of tinkering with my printer though, to get it back to printing properly again.

Sunday, 15 July 2018

MicroVickers

This is a model I printed a little while ago when I was learning my way around what to expect from my Ender-3, now all painted up and ready for the wargames table. It's a model I originally designed to be SLA-printed by Shapeways, modified to print better on my own FDM machine.

It's is a British Vickers Medium Mk.II, the standard workhorse tank of the British army from the mid 1920s through to the mid 1930s.

The model has been printed in PLA at 0.08mm, and I modified the model to remove the gun and leave a dimple to indicate where I should bore a hole for a brass pin. Printing wires in this size is seldom very successful I've found, and using a piece of brass is much cleaner and easier in the long run. The paints are all Vallejo acrylics.

The model quality is surprisingly good; I wasn't really expecting anything much more than a vaguely Vickers-shaped blob, but the detail the printer has rendered is quite acceptable in a wargaming piece.

Monday, 7 May 2018

PSC 15mm M3 Stuart "Honey" — first look

 The M3 Stuart "Honey" from the Plastic Soldier Company in 15mm makes up into a good representation of the original, and at the usual £20-ish for five models it's pretty good value.

However, there are a few things to be aware of before you launch into building these kits. More things than usual, in my experience of PSC kits, but nothing too intractable — for the most part the engineering is pretty good, but see below for my notes about the fit of the running-gear pieces.

NOTE: I am informed that the Honey in British service had the sponson-mounted machine-guns removed. Fortunately it's a simple matter to chop these ones off, and one of the sets of side-plates provided on the sprue has those points blanked off, which I will hopefully remember next time.


The usual PSC version display, colour-coded
for your inconvenience


WARNING! DANGER!

As usual, PSC have provided a colour-coded layout to show you which parts are for which version.

WARNING!

The hull-top parts are mis-coloured, and the one used for the British "Honey", which should be in green, is actually shown in red.

I found this out when I tried to get the track pieces with sand-guards to fit, and could not. Fortunately the cement holding it to the hull-bottom had not yet set hard, and I was able to prise the two pieces apart and fit the right one.


 The instruction sheet shows the process for building the "Honey" only, and nothing at all for the other two (American) versions of the machine.

Fortunately that doesn't affect me, since I'm only interested in the British version.

The illustrations are easy enough to follow, better by far than some of PSC's instruction sheets, but the pictures are still a bit dark and low-contrast. I've cleaned them up considerably for this illustration.

NOTE: If you glue on the auxiliary fuel tanks as shown in the last picture before you have the turret in place, you will not be able to get the turret on without shaving off its locating lugs. Also, with the tanks in place the turret will no longer rotate 360°.


The only major issue I had with the fit of the parts was with the running-gear pieces with the sand-guards — they would not seat seamlessly against the hull top, and left a large and obvious gap along the front outer edge.

I found that what I had to do was to shave down the front half or so of the back of the piece — I've outlined the relevant area in the illustration — until it was flush with the front sprocket moulding. Then the piece settled properly hard up against the mudguard-edge.

There is still a visible seam, but it's not nearly as bad as it originally was. I assume this won't be an issue for the American versions, as they don't have to align with the sand-guards.

PSC Valentine — Alternative Turrets

Valentine Mk.II

The PSC 15mm (1/100) Valentine sprue includes parts to make alternate turrets for the Mk.II, Mk.III, or Mk.IX versions of the tank. These two images show the turrets for the Mk.II (above) and the Mk.IX (below) on the hull I finished yesterday.

Valentine Mk.IX (on Mk.II-III running gear)

Sunday, 6 May 2018

PSC 15mm Valentine Mk.III

This is the 15mm (1/100) Valentine Mk.III from the Plastic Soldier Company.

I may have gone a little bit overboard with the weathering I think. The vehicles in the desert took quite a hammering from the environment, but in this case I might have got a bit carried away. Ah well.


Friday, 29 September 2017

Covenanter (15mm)

This is my 3d-printed Covenanter cruiser  tank of 1941.

This one is printed in WSF nylon by Shapeways, and  though I think it's OK for tabletop use, I'd like to get one printed in FUD resin, as a lot of the rivets and hinges and things have been lost or softened a lot in the lower resolution material.

I'll probably replace the gun barrel at some stage with one turned down from brass rod.

Rear view

Top view

Side views

Tuesday, 4 July 2017

Zvezda A13 Cruiser Mk.IV

Here's the first of the 1:100 scale A13 cruisers from Zvezda, painted up and ready for the wargames table.

It's definitely what I'd call tabletop quality, designed to be seen from a reasonable distance. The Dark Green #4 and Khaki Green #3 scheme is a bit more contrasty than it would have been in the flesh, since otherwise the camouflage pattern tends to merge into a single greenish blob. Likewise, the dry-brushing to bring out the lines and detail of the model is very contrasty, and for the same reason.

These little models aren't diorama quality, but for wargames miniatures they serve very well.

Front quarter

Rear quarter

Top view

Tuesday, 27 June 2017

Zvezda Cruiser Mk.IV A-13 (1:100) — a first look

I bought a troop of A-13 cruiser tanks for my 15mm BEF forces. The snap-together kits are by Zvezda, for their Art of Tactic game, and were sourced from PSC for about four quid each. They're moulded in a tan brown plastic — I've photographed them here after spraying them with Khaki Green #3 over a black primer.

As wargaming models go, they're really very good, especially considering their cheapness. There are a few issues to be aware of though:

  • First, due to the construction of the turret, there's a fairly prominent seam running across the front plate that purists will probably want to address with filler. Whether I'm all that pure is yet to be decided.
  • The headlight isn't moulded into its housing, so it will have to be painted in.
  • There is no aerial mounting provided at all, so if one is desired it will have to be scratch-built or otherwise sourced.
  • The 2pdr gun barrel is moulded extremely finely and looks to me as though it might be a bit fragile for the hurly-burly of wargaming; I will probably replace them at some stage with turned brass barrels, as I usually do with my resin models.

Aside from these fairly minor problems, they're excellent little models. I haven't checked them for absolute dimensional accuracy, but they don't look out of place next to my older resin/metal cruisers. I've glued lead slugs inside their guts to give them a little bit of weight, as the bare plastic models could easily blow away in a slight breeze. Although they really do snap together and stay together (Zvezda's tooling is excellent) I've glued everything just in case.

I'm pretty happy with them; they're really excellent value for money and provide a welcome reinforcement to my plucky BEF.

Saturday, 24 June 2017

Minairons Panzer 1A (1:100)

Here's the diminutive 1:100 scale Panzer 1A from Minairons, alongside a couple of 15mm Battlefront Germans.

It's unlikely to do very well on any battlefield where there are actual tanks to fight, but as a mobile machine-gun pillbox it could be quite useful. I think that for 1940 I should probably be using the Panzer 1B or C, but they all look pretty similar and have pretty much identical stats, so this 1A can stand in for any of them.

They come five to a box; I got mine from The Plastic Soldier Company.

Starboard side

Front quarter

Rear quarter

Top
Sprue